Learning how to cut fabric straight is one of the introductory lessons for everyone before getting more advanced sewing steps. However, that doesn’t mean making a straight cut is easy.
There are tons of details that a beginner needs to pay attention to. It can be what tools to choose, what preparation to do, how many necessary steps, etc. But that’s precisely why I’m here with this article, to get you through all of these hardships.
Now to the biggest question:
How To Cut Fabric Straight?
You can choose either scissors or a rotary cutter to make this happen.
There are 4 steps if you use scissors:
- Step 1: Make the first straight
- Step 2: Make a square corner
- Step 3: Cut a square or a rectangle
- Step 4: Check your fabric again
Whereas, with a rotary cutter, you only need 2 steps:
- Step 1: Fold the fabric
- Step 2: Cut straight lines according to the ruler
I will reveal the detailed steps and how to prepare for the best result in the article.
So, keep on reading!

Factors Affecting Cutting Fabric
If you overlook some factors, the success rate of this process will decrease considerably even before the preparation stage. So what are these factors?
Fabric Types
Different fabric types will affect how you cut them. Almost every kind has its own grainlines, which are the direction of the threads parallel to the selvage edges. (1) Therefore, you need to consider various cutting ways depending on the fabric material.
Here are some examples:
- Plain fabric: You need to put the face upside before cutting. Checking what side is smoother is the most common way to differentiate the face from the back.
- Leather: With this material, remember to use a rotary cutter as scissors will tear it apart.
- Chiffon: A rotary cutter is also more suitable for chiffon as it prevents fabric from shifting.
- Delicate fabrics: For soft fabrics like silk, you should place paper beneath them when cutting to avoid ruining the texture.

Cutting Tools
Scissors and rotary cutters are the two most common tools for cutting fabric. Each has its own strengths and drawbacks. Keep on reading to find out which one is more suitable for you.
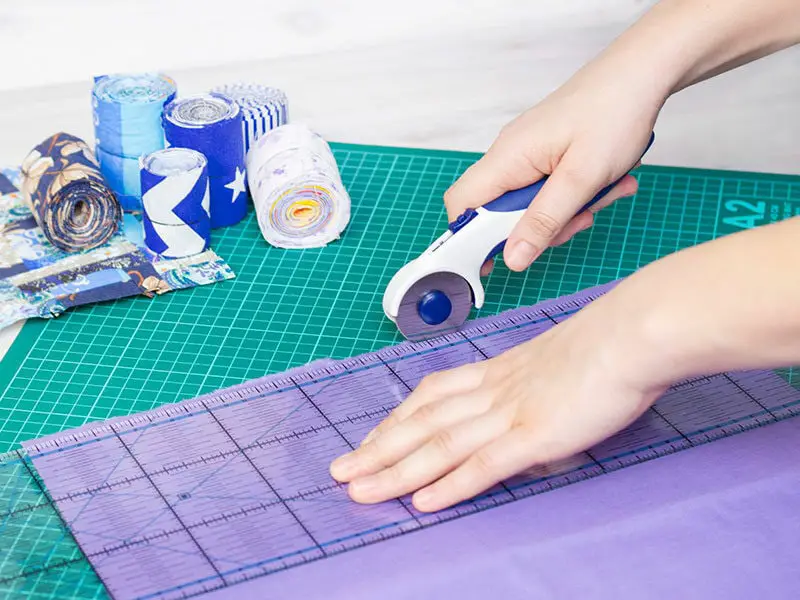
This tool is specialized for cutting straight lines. Just combine it with a ruler, you’ll get an accurate straight line. However, if you aren’t used to it, injuries are likely to happen. Also, when using a rotary cutter, you will need a self-healing mat beneath the fabric to avoid damage to the furniture.
- Scissors
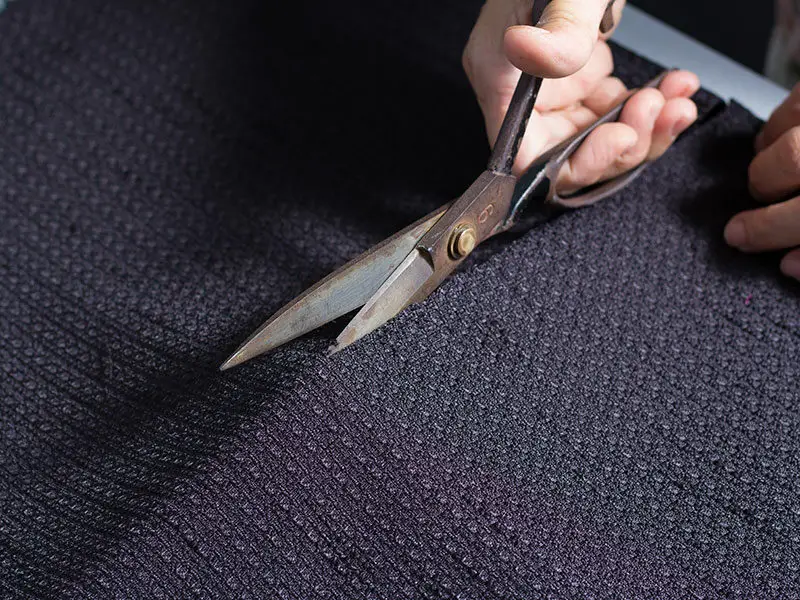
Scissors are a traditional tool that every tailor owns. Though they may not be as fast as a rotary cutter, scissors are safer and more comfortable to use. Just make sure to sharpen the blades before use.
Preparations To Cut Fabric Straight
Even if you pay a close look at these factors, there are still some preparations you need to do before getting to the main deal.
Step 1: Wash And Iron Fabric
Before cutting any fabric, make sure you wash it in advance. That way, the material will shrink a little and make it easier for you to look for straight grainlines. Remember to dry it before cutting.
After that, you should iron it to remove any wrinkles and return the fabric to its actual size. And you can take measurements more precisely.

Step 2: Find A Hard Flat Surface
A hard flat surface is essential to make the cutting line straight. Stay away from the carpeted floor or your bed, no matter how comfortable it is. The best choice is often the table, especially a cutting table. Or you can turn to your dinner table as well.
Make sure to clean your table beforehand and keep all the fabric edges on the table. If some of the fabric is hanging out, you may unconsciously pull it, causing uneven lines. You can also use the floor as the last option.
Step 3: Prepare Cutting Tools
Cutting tools play an essential role in cutting fabric straight. Let’s look through some noticeable features when preparing your chosen cutting tools.
- Scissors:
The most crucial point when it comes to scissors is their sharpness. As time passes, scissors will get duller, and you need to sharpen the blade for a clean cut. Also, you can choose either bent-handled scissors or blunt-point scissors.
The former, with an angled handle, will help you cut more comfortably. At the same time, the latter will protect your fabric from tearing.
- Rotary cutter:
Rotary cutters have three different types based on their size. First is the 28mm rotary cutters. You can use them to cut small and curved pieces. Then, you have pretty larger rotary cutters with 45mm in size. These cutters are the most suitable for beginners.
When you are more used to working with fabric, you can change to one of the largest rotary cutter types: 60mm rotary cutters. While the 45mm ones can only cut through two layers of fabric at most, 60mm ones can make it through several layers simultaneously.
4 Steps To Cut Fabric Straight With Scissors
Every household owns a pair of scissors. You may argue it isn’t used for cutting fabric, but that doesn’t matter much. Keep them sharp and follow these steps, you will have beautiful straight cuts on your cloth.
Step 1: Make The First Straight Edge
You always need to find the first straight edge to begin cutting. You can first look at the selvage edge. Most of the time, your fabric’s selvage edge is straight. Then use a ruler to mark a parallel line with the edge and cut it.
However, sometimes you don’t have that privilege. At that time, you’ll need to make the first straight edge on your own. Snip about one inch from the edge to make the fabric fray. Next, just tear the fabric apart. You will have a quite straight ripped edge.
You can see this video to know more:
But this can’t count as the straight edge you need since it’s pretty ripply. Mark a straight line parallel to the ripped edge, about one inch apart. Cut along with the line, and you have the first straight edge.
Step 2: Make A Square Corner
After getting your first straight line, spread your fabric on the table. Make sure the straight edge is aligned with one of the table edges. Place some objects on the material to keep it in place.
Now, look at another edge of the fabric to see whether it lines up precisely with the respective table edge. If it goes inward or outward of the table edge, use your scissors to trim the excess fabric. You can draw a line parallel to the table edge, so it’s easier for you to cut.

Step 3: Cut A Square Or A Rectangle
Now you have two straight lines. Things get pretty much more manageable. Use your ruler to measure the size you want from one of the straight edges, draw a line and cut along with it.
Step 4: Check Your Fabric Again
It’s essential to check your cut fabric. Fold it in half both vertically and horizontally to see whether all four edges are straight. If not, you can remeasure it and trim away the unnecessary parts.
How To Cut Fabric Straight With A Rotary Cutter
A rotary cutter doesn’t require as many steps as scissors. However, you need to prepare some additional tools to go along with it. What are those? Let’s find out!
- A Cutting Mat
Unlike scissors, a rotary cutter tends to damage the material beneath the fabric. So, if you don’t want your table full of scratches after cutting, you need a cutting mat. Or, to be specific, a self-healing mat.
This kind of mat will self-repair any cuts caused by your rotary cutter. It’d be better if you choose a cutting mat that can cover all the working surface.
- Safety Gloves
If you have never used a rotary cutter before, I insist you buy a pair of protective gloves. This cutter can easily slip out of turn, causing tremendous injury to your hand if careless. These safety gloves will protect your hands from the blade as they’re infused with steel.
- A Non-Slip Ruler
You’ll need to use the ruler alongside the cutter in this option, so it’s better to choose a non-slip one. Also, your ruler has to be transparent with clear measuring marks for you to make accurate cuts. If possible, buy an acrylic ruler since it’s sturdy enough to run a rotary cutter along its edge.

When you’ve had all the necessary tools, here is the guide you need to follow to cut fabric straight.
Step 1: Fold The Fabric
If your fabric is too large for your cutting mat, fold it into a manageable size.
Step 2: Cut straight lines according to the ruler
Set your non-slip ruler aligned together with the lines on the cutting mat. Run the rotary cutter to run along the ruler’s edge. And there you have your straight line. Make sure to hold your ruler firmly in place.
You can see this video to know more:
Frequently Asked Questions About Cutting Fabric Straight
Cutting fabric straight is no rocket science. Despite that, there are still various questions people keep wondering. And answering them is my job. Scroll down for some of the most frequent problems and how to solve them.
Additional Advice
When cutting fabric with scissors, you should keep them upright with the cloth to make the cutting straight. Or else your cutting line will get a bit curved or bent. And if you aren’t used to cutting fabric, just make it slowly, don’t need to rush it.
With this article, I hope you can make beautiful straight cuts with your cloth from now on. Don’t forget to share it with anyone in need. And leave a comment below if you have other ideas about cutting fabric straight. Thanks a lot!

References
- En.wikipedia.org. 2021. Selvage – Wikipedia.

 Top 15 Best Quilting Thimbles