There are a lot of different sewing stitches to use on your project. Here I’ll show you what main stitches are available, and when best to use them. Most of the time when you are assembling a project, the straight stitch is used.
However, certain fabrics (like ones with stretch) will require different stitches. There are also stitches that are for covering the raw edge of your fabric, and stitches that are better for mending (like a ladder stitch by hand to sew a rip closed).
If you do not have a sewing machine, you can use hand stitching for basic needs like mending. While making clothes by hand stitching is possible (after all, the sewing machine was only in use in the 1800s, before that everything was made by hand), unless you have tons of time to devote to hand sewing, you are probably going to want to use a sewing machine.
Stitching By Hand Or Machine: Which Is Best?
When it comes to sewing, there are two main types of sewing stitches to choose from: machine or hand stitches.
Machine stitches are often more durable than hand stitches, but both have their uses. An advantage that hand-sewing stitches have over machine stitches is that it can be easier to sew invisibly during mending or hemming.
Both machine and hand stitches can be used for decorative sewing.
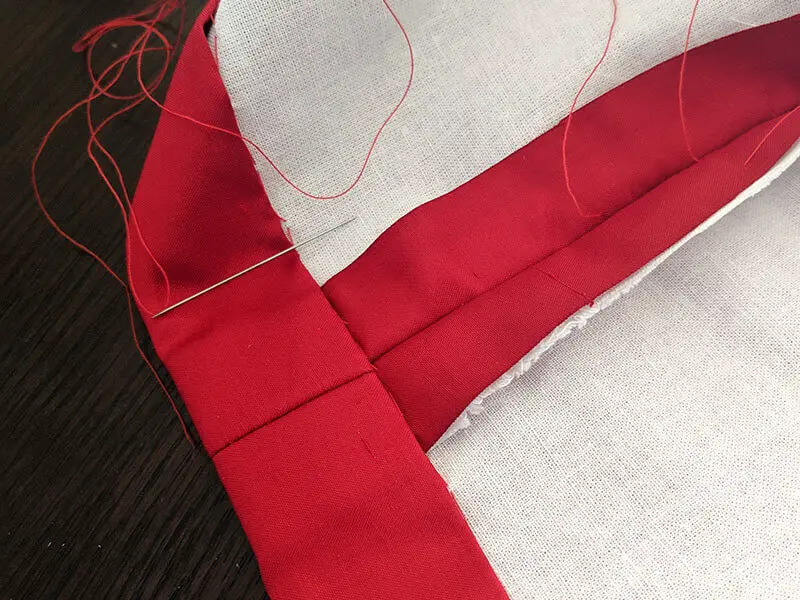
List of Sewing Machine Stitches
While some sewing machines boast more than 50 stitches, you really don’t need that many for most sewing projects. A lot of those stitches refer to various decorative stitches that can be used for embellishments. The most important stitches are really just straight stitch and zig-zag.
Here is a list of stitches that you might come across when you are looking at different sewing machine models:
- Straight stitch (lock stitch)
- Zig-zag
- 3-step zig-zag
- Overcasting stitch
- Overcast stretch stitching
- Blind hem
- Buttonhole
- Bar tack
- Decorative and Embroidery
- Chain stitch
- Gathering stitch
- Machine basting
- Topstitching
- Understitching
- Faggoting stitch
Serging
Sergers and sewing machines are different machines. A serger uses 3 or 4 spools of thread to overlock a seam. It does not use a bobbin, and does not create a regular stitch (lockstitch). If you make clothes, a serger is a handy machine to have to give your clothes a professional finish.
A serged seam is also a good choice to use for sewing fabric with stretch such as leggings.
- 4 thread serging
- 3 thread serging
- Coverstitch
- Rolled hem
Hand Stitches
While it does take a bit of practice to do hand sewing, if you have a needle and thread you can learn to mend, decorate, and make small sewing and craft projects.
Be sure to use a quality thread, as some bargain brands of thread tend to be less smooth and those flyaway fibers are more likely to cause snags and knot while you sew.
- Running stitch
- Backstitch
- Prick stitch
- Slip Stitch
- Blanket stitch
- Whipstitch
- Couching
- Cross stitch
- Herringbone stitch
- Basting
- Ladder stitch
- Darning stitch
- Tailor’s tack
When To Use Different Sewing Machine Stitches?
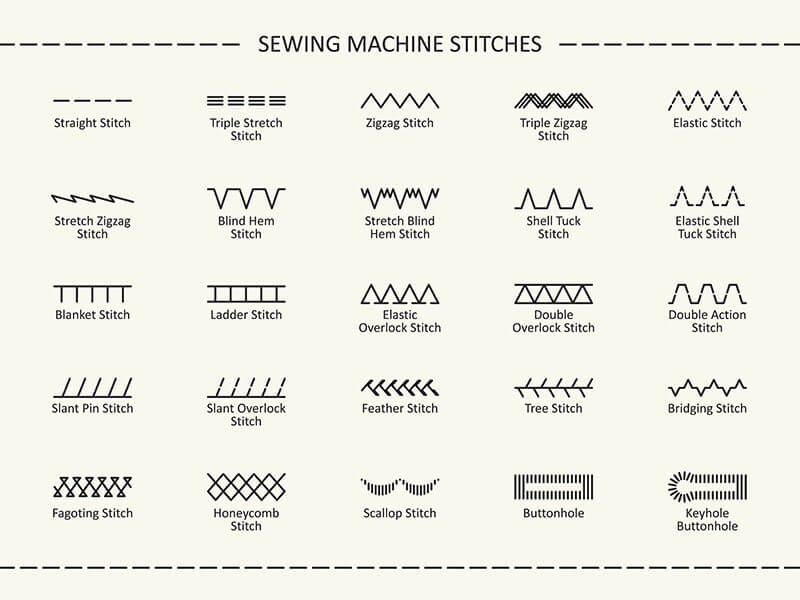
A straight stitch is used the vast majority of the time to create seams, hem, repair and more. However, there are a variety of specialized stitches available to use, depending on what stitches your machine has.
Here are some other stitches to consider using, with suggested fabrics and applications. You will notice that fabric with stretch in particular can benefit from specialized stitches.
Straight Stitch (Lock Stitch)
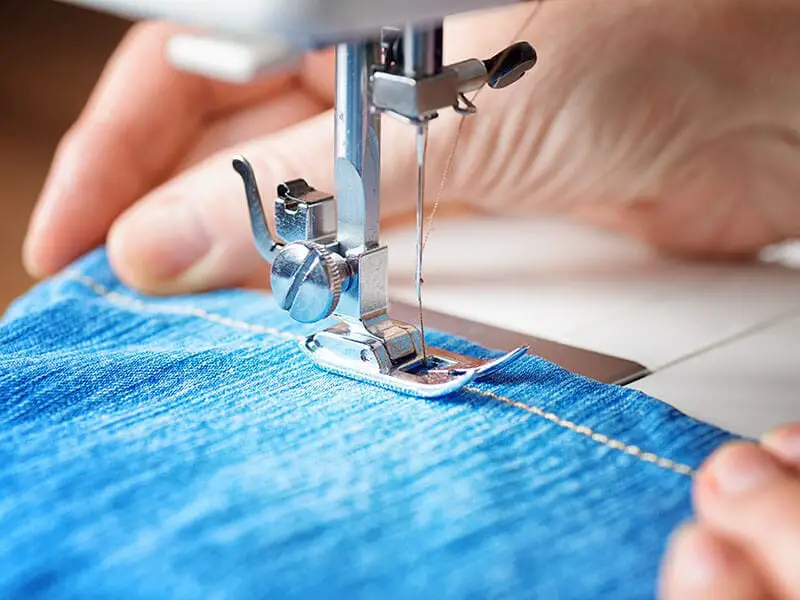
This is a “regular” sewing machine stitch. A straight stitch is used for creating seams and attaching fabric together, for zippers, etc. It is used by far the most often in regular sewing.
To make a seam, put two pieces of fabric right sides together and place them under the presser foot. (The right side of the fabric means the side that is meant to be showing on a finished project). Lower the foot and reverse a few stitches, then sew forward over the stitches. End your seam with a few reverse stitches. This helps prevent the seam from unraveling.
Zig-Zag
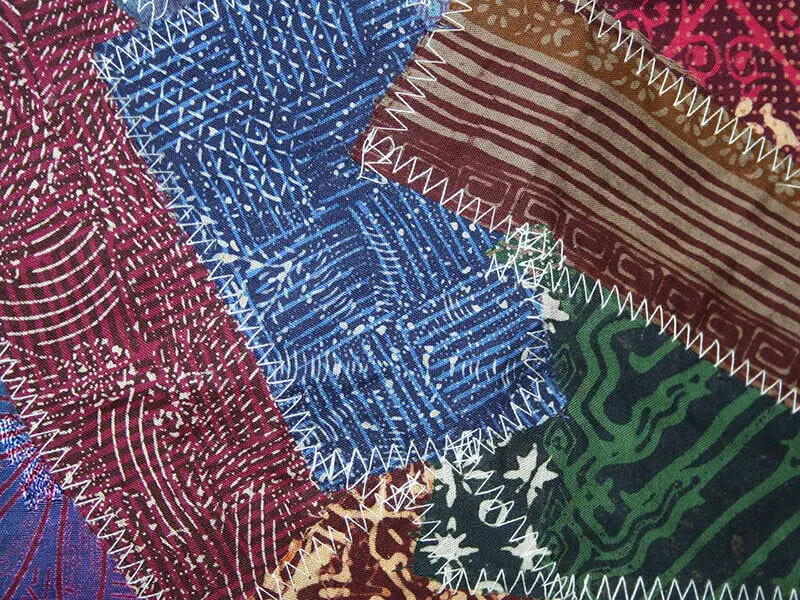
A zig-zag stitch has two main applications:
- It can be used on the cut (raw) edge of the fabric to prevent it from fraying
- A narrow zig-zag can be used to seam stretch fabric.
The zig-zag stitches stretch with the fabric. This is important because if the fabric stretches and the stitches do not, the stitches will break when the fabric stretches.
It can also be used to prevent the fraying of appliques. Always make sure you use a zig-zag foot – this foot has more space for the needle to go side to side.
Find out more about zig-zag stitches.
3-step zig-zag
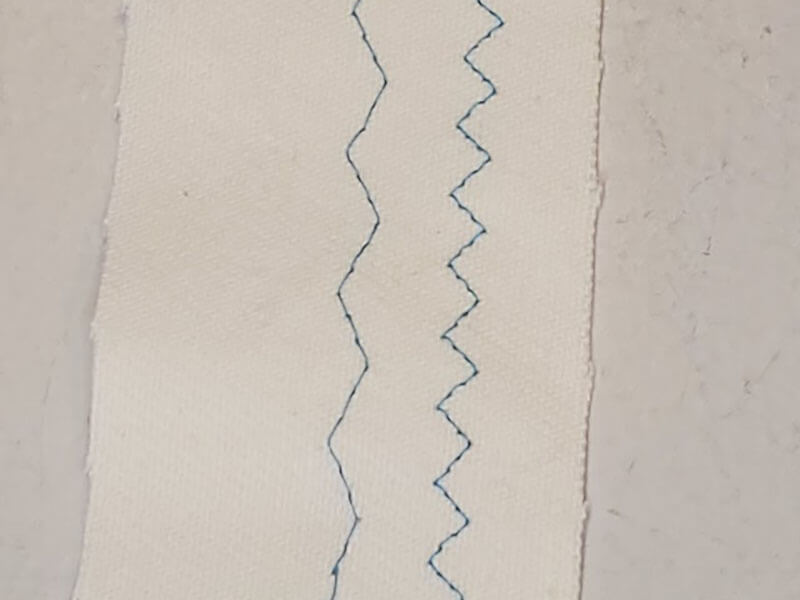
This is used for sewing stretch fabrics. Each “zig” or “zag” is made up of 3 small stitches. When the fabric stretches, these stitches are able to stretch between them more than a regular zig-zag.
It can also be used to topstitch stretch fabric in a more decorative way, such as around decorative elastic edging. This is a good stitch for sewing elastic.
Overcasting Stitch
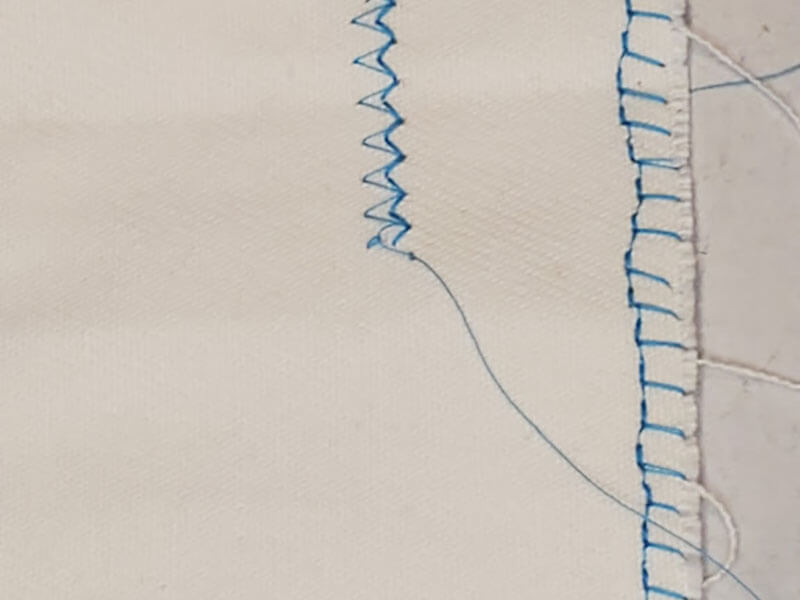
If you need to cover a raw edge of the fabric to prevent fraying, this is a good option. Slightly better at this task than a regular zig-zag stitch.
Stitch the overcasting stitch around the edges of your fabric before assembling your project. The needle goes side to side, so you will need a zipper foot or the needle will hit the foot which can break the needle.
Your machine may have more than one overcasting stitch to choose from. Here are two from my machine.
Blind hem
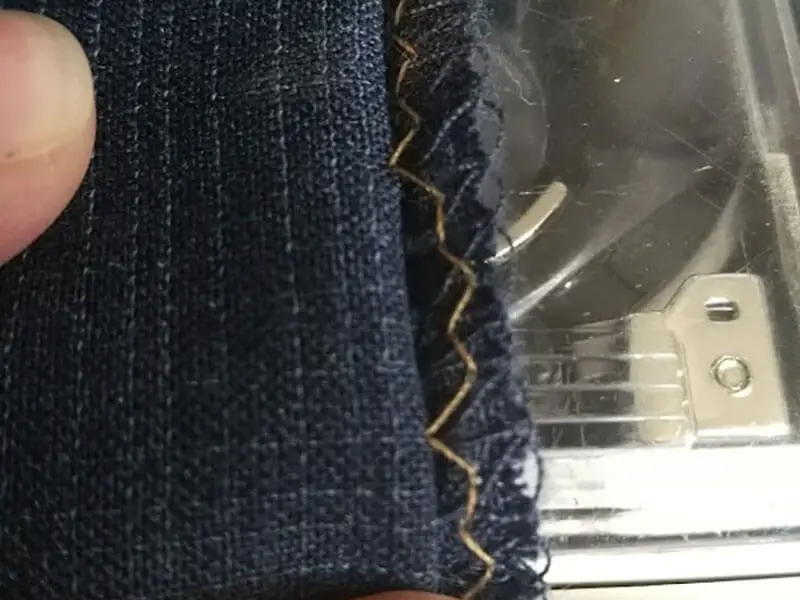
Some domestic sewing machines come with a blind hem stitch option. This is a great way to hem clothing in a way that is almost invisible. The stitch looks almost like a small zig-zag with a larger zig-zag every few stitches.
Fold your hem under twice, then peel it back just enough to stitch the small zig-zag on the hem allowance and the big zig-zag takes just a small “bite” out of the right side of the fabric. The result is that the stitch is hard to see from the other side.
Buttonhole
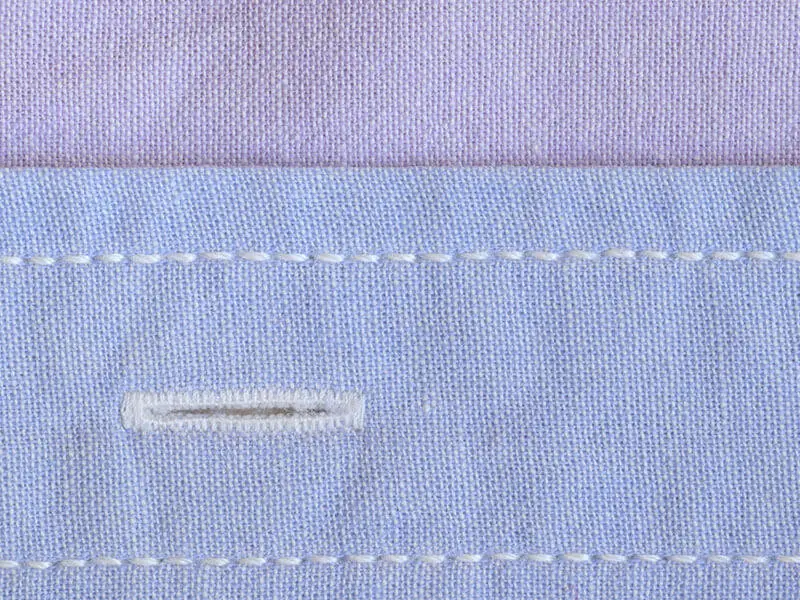
There are different styles of buttonholes available, but they all serve the same purpose. The different options are really just for the buttonhole style.
Different models of machines have different types and they might stitch differently. Adjust the size to your button (a good rule is to make your buttonhole ⅛” longer than your button). The buttonhole may be sewn in 4 steps or newer machines have a one-step buttonhole.
You will have to cut the hole open after you stitch the buttonhole.
Bar Tack
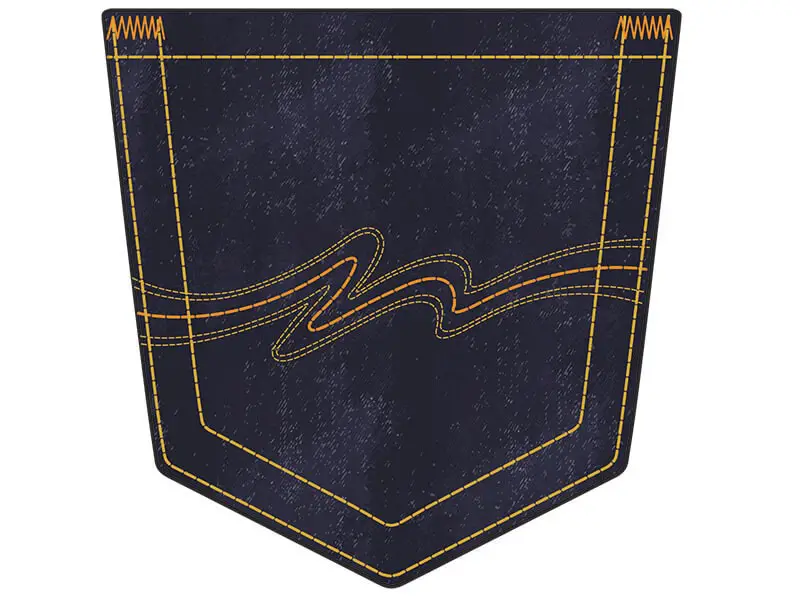
A few stitches back and forth in the same spot creates a bar tack. This is used for reinforcement of areas that might have a bit more strain on the fabric, such as around pocket openings.
There may be a stitch dedicated just for bar tacks on machines, but often it is one step of the buttonhole (the narrow end – usually step 2 in a 4-step buttonhole).
You can also create a bar tack by using a zig-zag stitch with a short stitch length.
Stretch Stitches
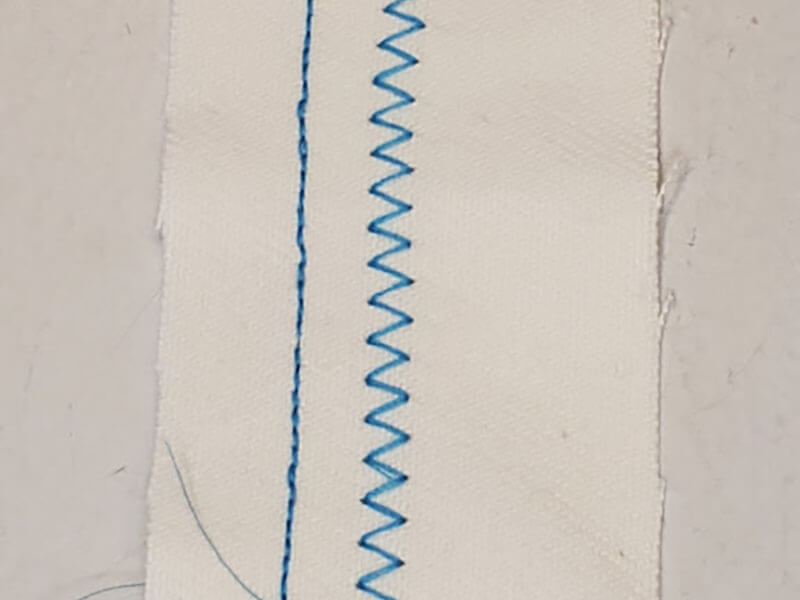
Stretch stitches can vary by machine, but many are a variation of a zig-zag or a pattern made up of short stitches. Some common shapes are:
- Triangles
- Rectangles
- Lightning bolts
- Diamond
- Straight stitches that are made of tiny stitches that stitch forward and backwards (pictured below)
- Ric Rac zig-zag (pictured below)
Small stitches in these patterns give the fabric and stitch the ability to stretch together to prevent the seam from snapping when stretched.
When choosing the best stretch stitch for your project, I recommend practicing on scrap fabric and see which one gives the best result for your fabric and project needs.
Using different stretch stitches to sew knit fabric without a serger.
Decorative And Embroidery Stitches
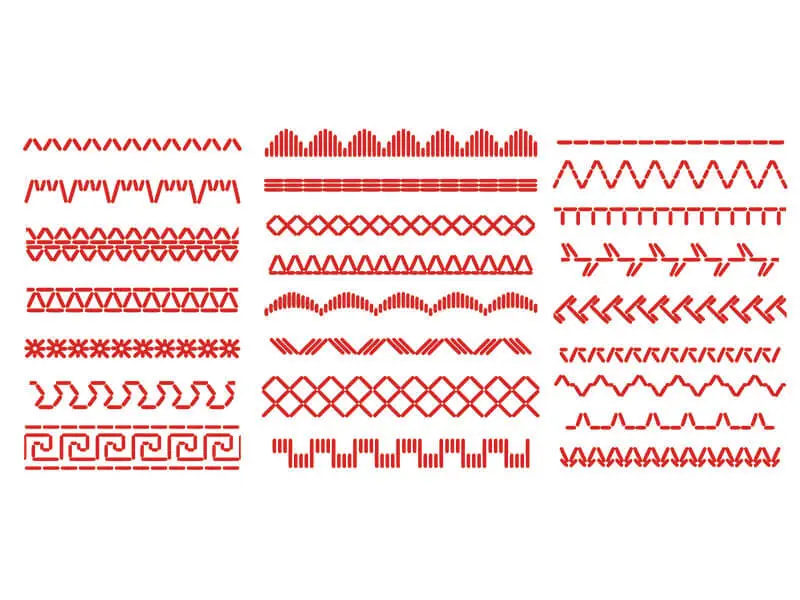
Decorate your sewing projects and other textiles with decorative or embroidery stitches. These can vary widely – everything from geometric shapes to monogramming.
Decorative stitches can vary widely by machine. Usually you will need to use a zig-zag foot to accommodate the needle going back and forth to create the decorative stitch.
Chain Stitch
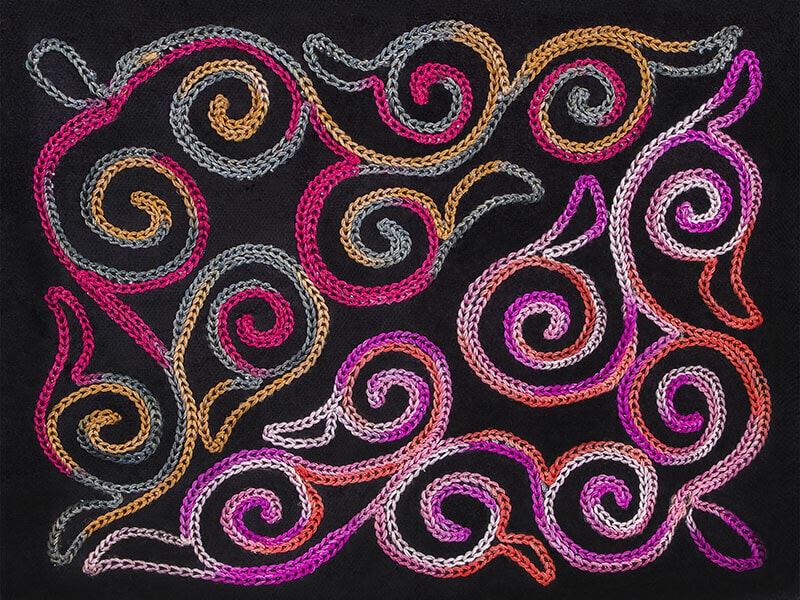
This stitch doesn’t appear as often since it is not sewn using a bobbin (a small spool on the underside of the fabric that creates a locking stitch).
Instead, it creates loops of thread in a chain formation on the top of the fabric. This can be used as a type of machine embroidery to embellish fabrics.
Chain stitch can also be found on the inseam of jeans, and in packaging such as to seal large bags of rice or potatoes.
Pulling one thread on a chain stitch can unravel the whole thing, which is why it is used in sealing large bags of food.
Gathering Stitch
A gathering stitch is just a regular stitch on a long stitch length. To gather fabric, sew 1 or 2 lines of stitching on the longest stitch length in the seam allowance. Pull the bobbin threads to gather the fabric.
Gathering stitches are commonly used in sewing pattern instructions to create ruffles, and are also used to gather fabric into sleeves. Gathering stitches are usually removed after the project has been sewn together with a regular stitch.
Machine Basting
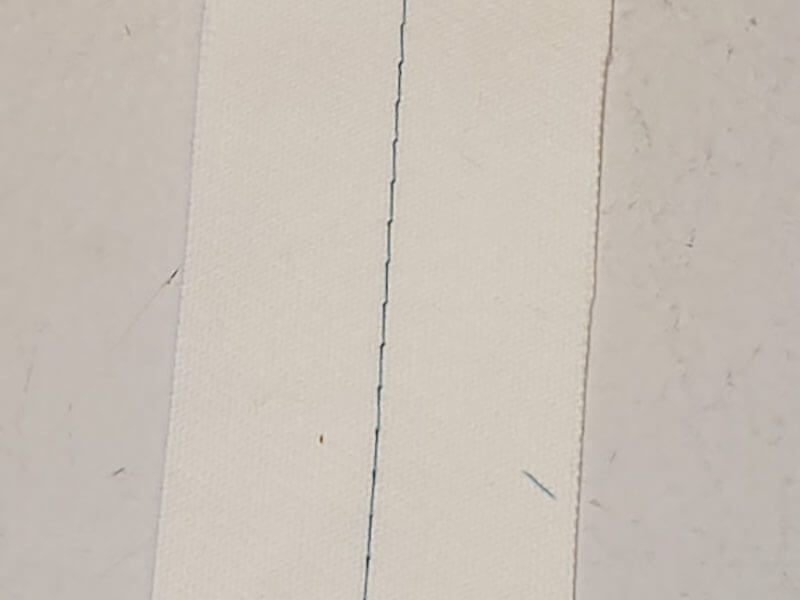
Again, this is actually just a long regular stitch. Since the stitches are longer, the threads can more easily be removed.
This can be useful to temporarily hold fabric together that might be difficult to sew, or when sewing clothes that are likely to need adjustment for a better fit.
Topstitching
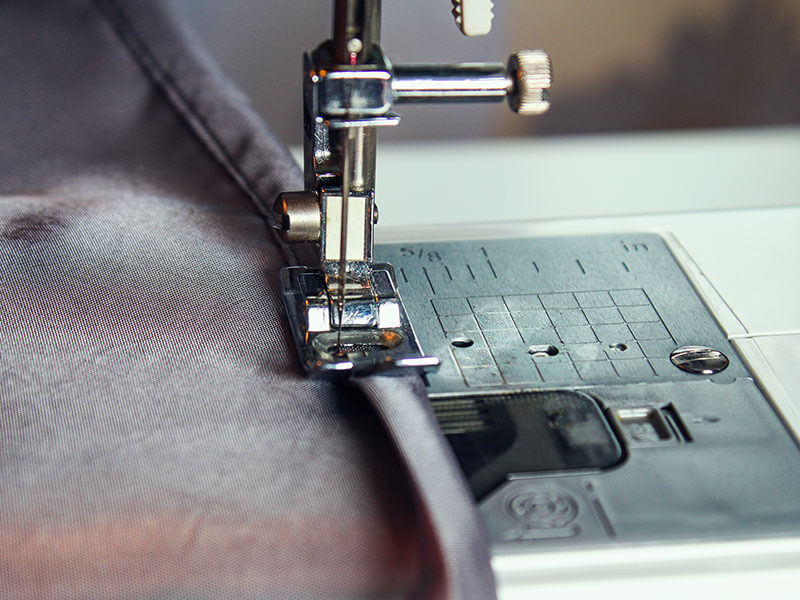
After the fabric has been seamed together, it can be topstitched. This is just sewing on the top of something that has already been assembled. Topstitching can be decorative and it can also make for stronger seams.
Topstitching can be done with a regular straight stitch, but it can be with one needle or a double needle. The inseam of jeans are commonly topstitched with a double needle to make the seam more durable.
Topstitching around a cuff or collar is more decorative, and can help the fabric look really crisp.
Understitching
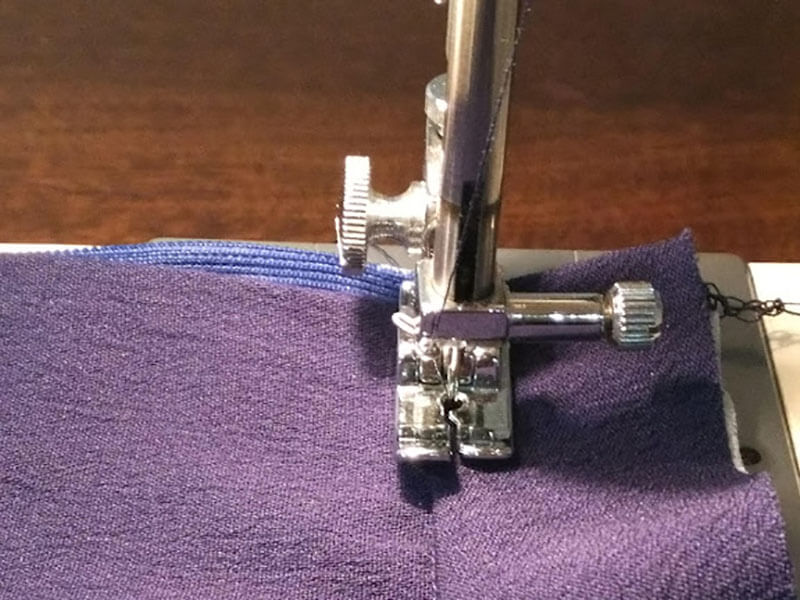
Again this isn’t a stitch to select from a machine, it’s a regular straight stitch and stitch length.
Understitch refers to sewing a lining through the lining and seam allowance after it has already been sewn to the garment to make the lining lay flat inside the garment. This can make a really nice finish to clothing as it helps the neckline (or area where it is used) lay nice and crisp.
Faggoting Stitch
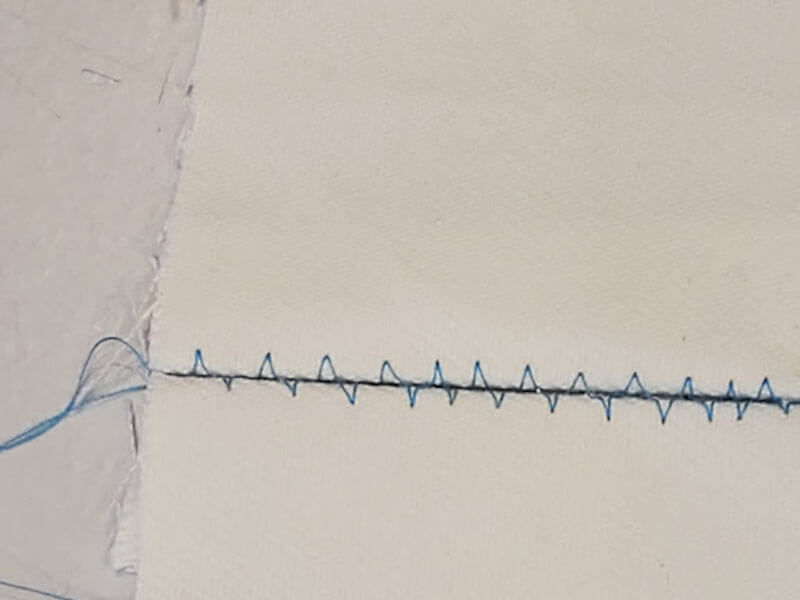
This is similar to a zig-zag that is used to attach two pieces of fabric next to each other in a decorative way.
Fold the seam allowance under ⅝” on both pieces and put a piece of paper underneath while you stitch, catching the fabric on each side. Remove the paper after stitching.
Serging and Coverstitch
Sergers are different than sewing machines. Their purpose is to cover raw fabric edges with thread.
Sergers can use 3 or 4 spools of thread. In some cases, wooly nylon thread is recommended (especially for activewear), but you can get started with serger thread. Serger thread comes on large spools as sergers use a lot of thread. If you use a regular spool of thread in a serger it will work but you will use up a lot of thread really quickly.
4-Thread Serging
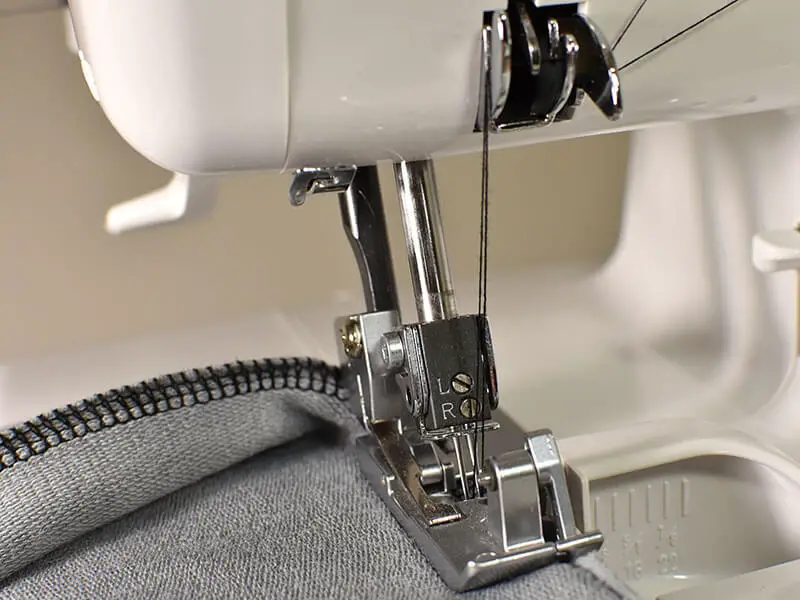
This is used to sew seams with a serger. There are two sewing needles and two loopers. The loopers stitch around the edge of the fabric and the needles create a seam.
The seam that is created by using a 4 thread serger is quite narrow (around ¼”) and is suitable for making stretch garments like leggings, T-shirts, or baby clothes. Serged seams do stretch with the fabric, which is why it is a great choice for making clothes out of stretch fabrics.
Creating a seam with 4 thread serging is a fast and easy way to assemble garments since you seam and finish the edges of your fabric in one step.
3-Thread Serging
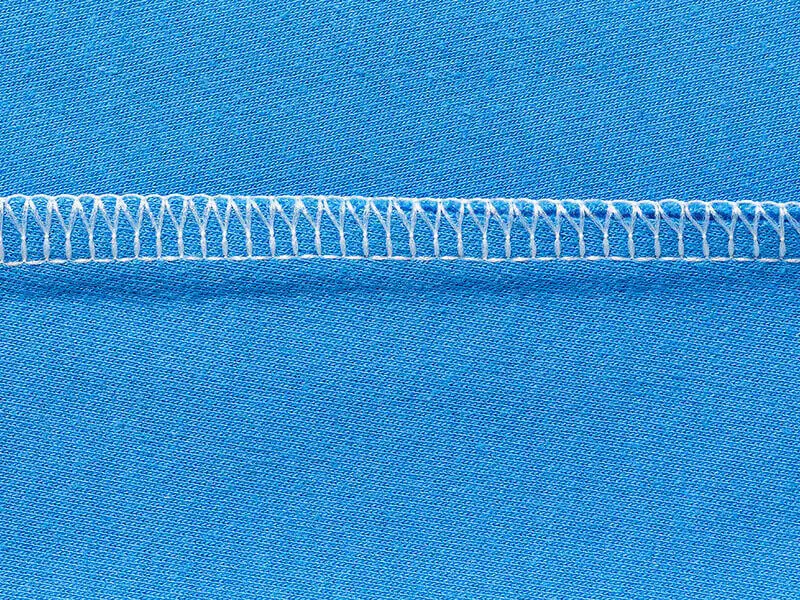
To change from 4 thread serging to 3 thread serging, you simply remove the outer needle. The loopers and needle create an overcast that encases the raw edge of the fabric with thread to prevent the fabric from fraying. This creates a professional finish to the inside of your sewing projects.
For best results with 3 thread serging, serge your seams after sewing with a regular stitch. Without the second needle, this technique is not as good for seaming fabric together as the 4 thread. However, it is a good choice to finish the raw edges of woven (non-stretchy) sewing projects.
Cover Stitch
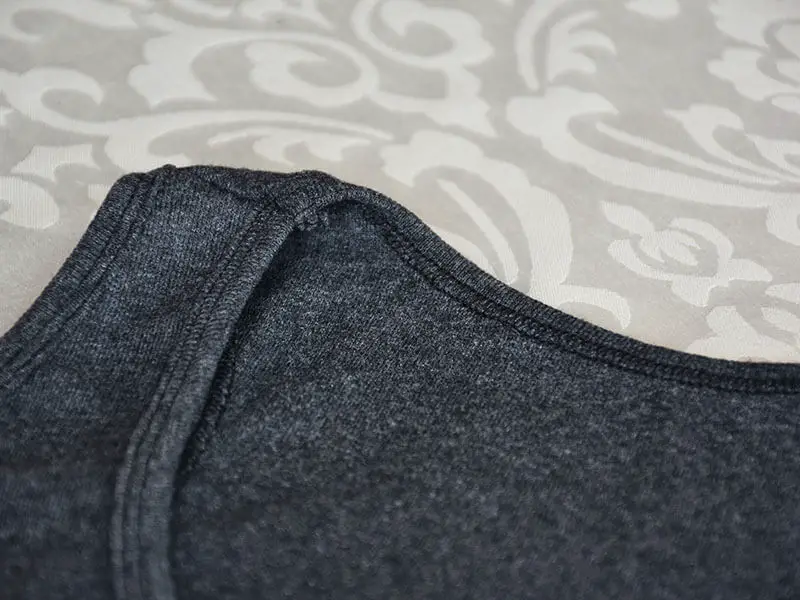
A cover stitch machine is different than a serger. This machine has two needles that create topstitching on the right side of the fabric. Underneath, the thread overcasts the raw edge.
Cover stitches are commonly used to hem T-shirts and yoga pants. In this case, the hem is folded under, usually with an allowance of ¾” to 1”. The hem is stitched with the top side of the fabric facing up.
Rolled Hem
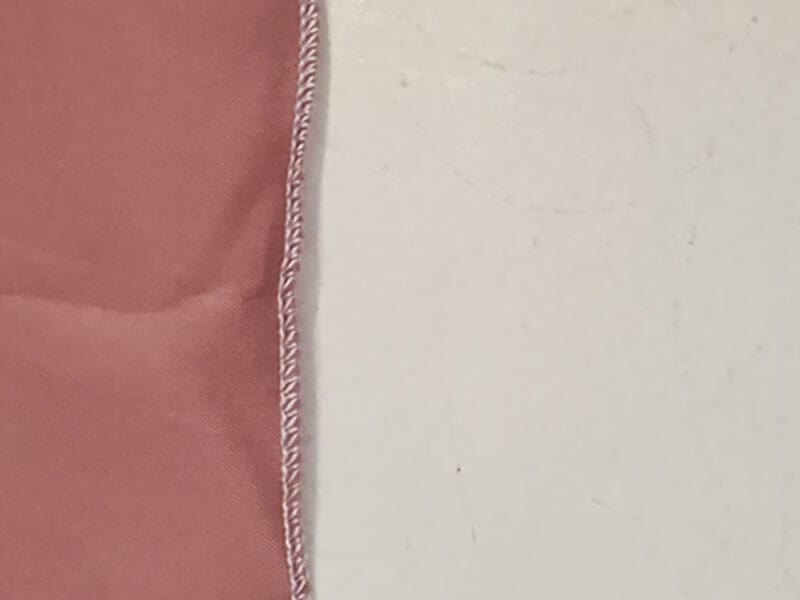
A rolled hem is a great feature on a serger that makes a very narrow (around ⅛” or less) thread-covered hem. When you sew a rolled hem with a serger, you do not need any seam allowance on your fabric, as it is covering the edge with a tight roll of thread.
Useful for finishing the edges of fabrics where you don’t want to sew a proper hem such as the bottom of flounces, fine fabric scarves, hems of chiffon dresses.
You can see this video to know more:
Different Sewing Stitches By Hand
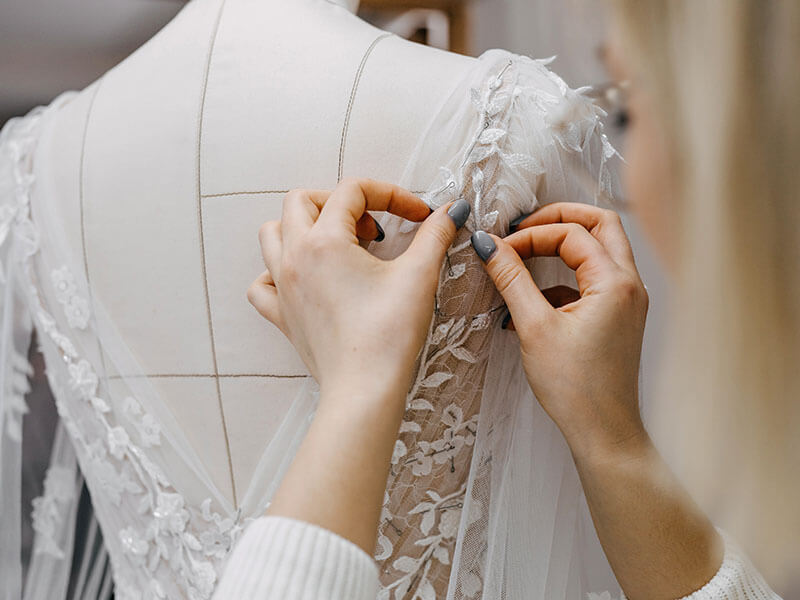
Sewing machine stitches are the fastest and most durable way to sew a project. But what about hand stitches?
Hand stitches do still have practical uses, even if you have a sewing machine. Sewing by hand can allow for precision. It’s also good for manipulating fabric a certain way that might be tricky at a sewing machine – especially for things like invisible mending or hiding threads.
There are also times when hand stitches are useful to temporarily mark fabric or hold it in place before being machine-sewn.
Here are my favorite hand stitches, and when to use them. Always knot the thread before proceeding.
Running Stitch
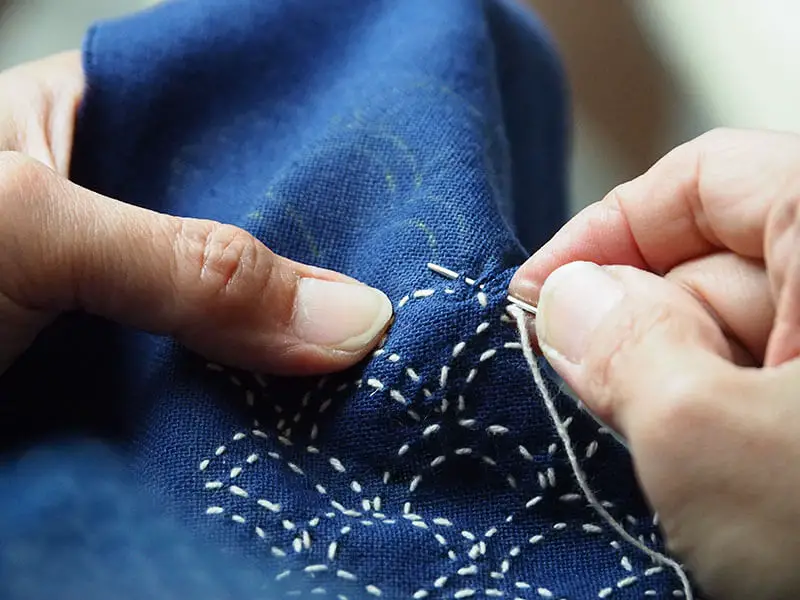
This is the most basic of hand stitches. Insert the needle in and out of the fabric in a straight line. This can be used to make seams and hold the fabric together.
Try to make the stitches the same length. The shorter the individual stitches, the less visible the gaps between the stitches if you are using this to make a seam.
You can see this video to know more:
Backstitch
Backstitching is a stronger hand sewing stitch than the running stitch. After your needle comes in and out of the fabric in a straight line, you put your needle back in behind where it came out of the fabric, about halfway between the two stitches. Insert it out of the fabric again, then behind and out in front of the stitch.
This allows the threads to overlap so you don’t have gaps in the stitching as you do with a running stitch. If you were to sew an item by hand, this is the best technique to use because you end up going over your stitches.
Prick Stitch (or Pick Stitch)
This technique is the same as the backstitch, except that you make a very small stitch backward, making the stitch hard to see from the top, but still strong.
An application I once used this for was to sew a zipper in a velvet dress. Machine sewing would have made visible seams in the velvet, but hand sewing it in looked much better. However, it was time-consuming.
Slip Stitch (or Ladder Stitch)
This is a great stitch to sew a gap closed in an invisible way. You sew between folded fabric from one side to another, back and forth. Then pull the thread to close the opening.
The ladder stitch can be used to mend rips and tears in fabric because it pulls the two edges together. It can also be used to sew an opening closed where a rectangle has been sew in right sides together and then flipped right way out (“bagged out”).
You can see this video to know more:
Blanket Stitch
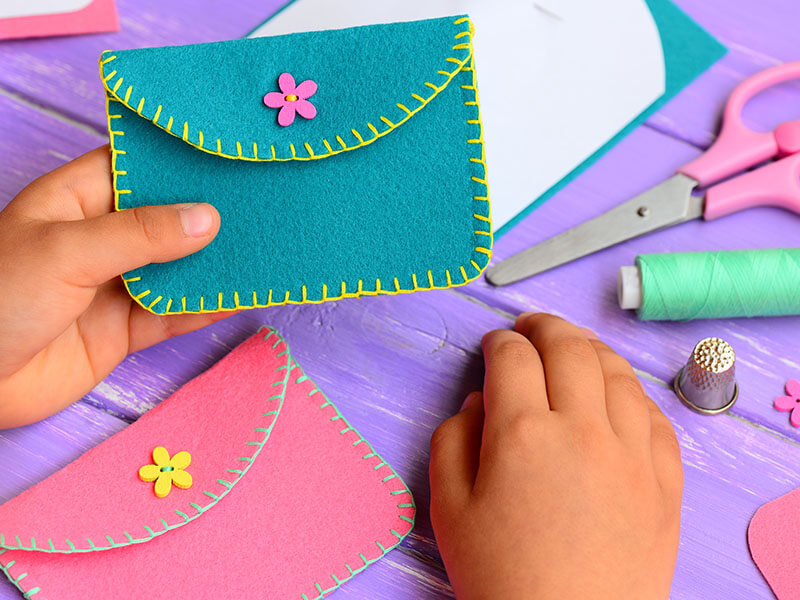
This was originally used for – yes, sewing around blankets! You can see this stitch on some old blankets (especially wool ones).
The blanket stitch is done at the edge of fabric and makes thread lay over the cut edge. The needle goes in the fabric from the top and sticks out of the edge of the fabric.
The thread gets wrapped around the needle, and as the needle comes out of the fabric it catches the thread wrapped around it, making an “L” shape on the outside of the fabric.
Blanket stitch can be a good choice for creating crafts by hand.
Whipstitch
Whipstitches are diagonal stitches that can be used to hold two pieces of fabric together along the edge. Or, it can be used around the edge of one fabric to prevent fraying.
To make a whip stitch, start with your needle underneath the fabric and pull it up through the fabric. Insert the needle back down to the upper right of your thread and pull through. Come up again a little above the first stitch and repeat the process.
Couching
Couching is a decorative technique where something like yarn, string or rope is laid over top of the fabric. The string is then covered with horizontal stitches that wrap around the string and the fabric.
Use couching to add decoration to home decors such as throw pillows and linens, or tote bags.
Cross Stitch
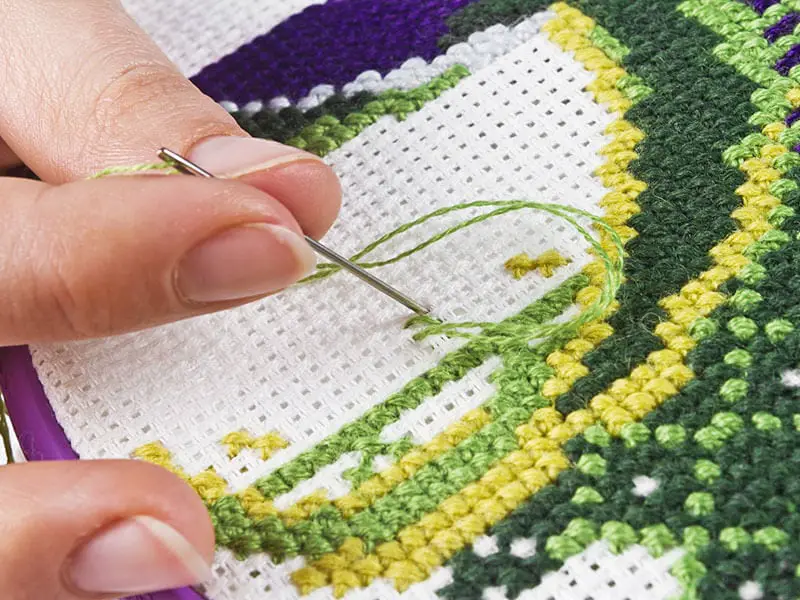
Cross stitch is a decorative stitch, where thread makes an “X”, and the cross stitches make a picture or words. It is done with embroidery floss, which is made up of 6 strands of thread twisted together.
In most embroidery, you need to separate the threads and use 3 threads at a time with a needle in a larger hole to accommodate the 3 threads.
Cross stitching can be commonly found on wall hangings or other decor such as throw pillows.
Let’s see this video:
Herringbone Stitch
The herringbone stitch is used to hem clothes by hand. This is a good choice for items like dress pants and gowns that you don’t want to be topstitched.
Turn the hem up twice. The stitches are on the inside of the garment and done with the needle pointing away from you. Alternate sides of the hem and garment to make an “X” as you stitch.
Taking just a small “bite” of the garment fabric means that you can hem almost invisibly. You can take larger stitches and secure your thread on the hem side.
Basting
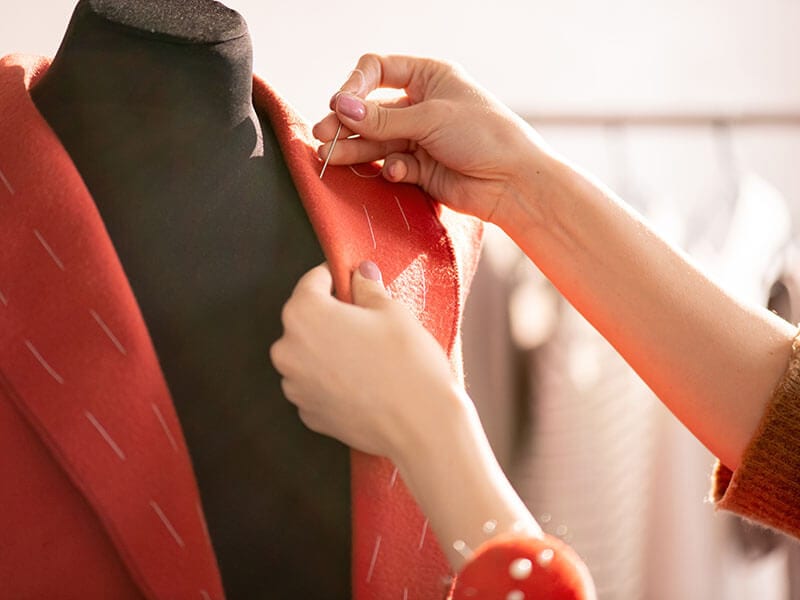
Basting stitches are long running stitches that hold the fabric in place temporarily. If you are sewing fabric that might slide around a lot when you machine sew it, you might find it helpful to baste in place first. I also use basting stitches to secure invisible zippers in place before sewing at the machine.
Sometimes taking an extra few minutes to hand baste a project together before you stitch it can save frustration at the sewing machine. Basting can also be called tacking.
Darning Stitch
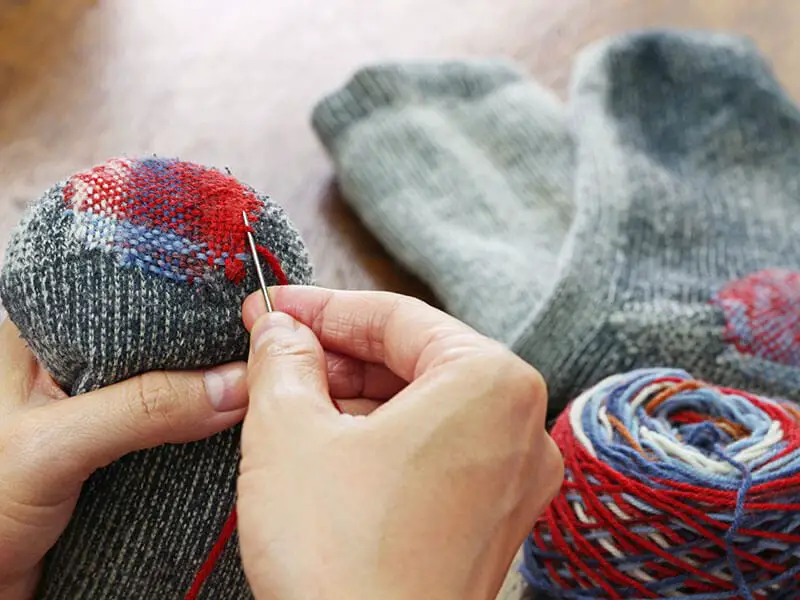
Darning means repairing holes in fabric that have been worn out. To do this, you need a thread that matches what you need to repair. You then create a thread grid and basically weave new fabric with thread over the hole.
First, you sew vertical lines of thread close to each other over the holes. Then you weave over and under each thread horizontally over the entire hole. Keep the threads so that they are touching right next to each other. This process is time-consuming and takes a fair bit of thread.
Tailor’s Tack
If you need a temporary marking on fabric such as for a pattern feature or to mark the end of a dart, a tailor’s tack is a useful stitch.
Take a needle and pull the thread through so the needle is in the halfway point of the thread. Don’t knot the thread and use the thread doubled like this.
Put the needle in the fabric from the top and poke up from underneath. Pull it through, leaving about half an inch of thread behind. Move the thread to the left and again put the needle in and up close to the previous stitch. Leave the loop it forms.
Cut the loop thread and trim the thread on the other side about ½”. This leaves a thread marking of 4 double threads to indicate a point on the fabric. Remove these threads when no longer needed.
Pad Stitching
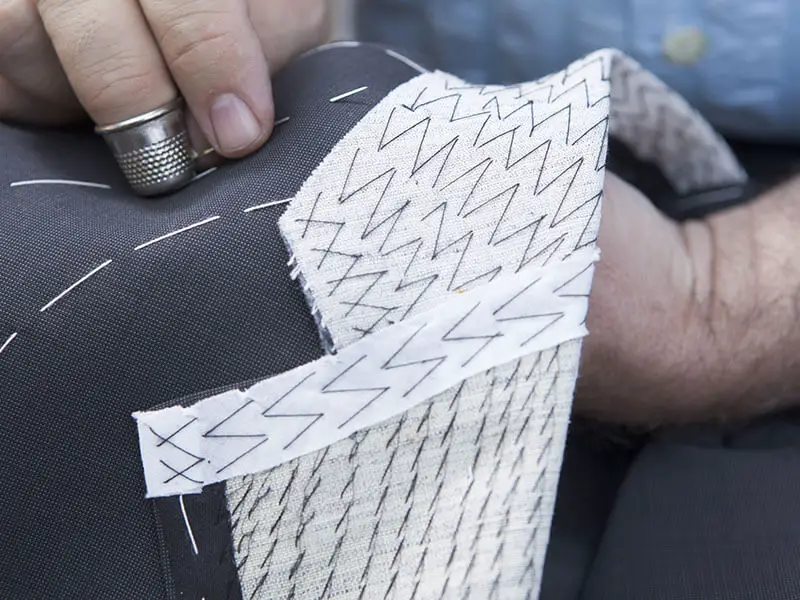
This is used almost only in the construction of suit jackets and coats that contain canvas in the chest or lapel area. Pad stitching a collar or lapel involves lots of small, hand stitches that form a V shape run throughout the canvas layer of a suit to help it keep its shape.
This is a tailoring technique that is used on high-quality suits and coats, as it is done by hand. This technique takes lots of time but results in a beautifully finished project.
You may find pad stitching in instructions for sewing patterns to make suit jackets, blazers, and coats.
You can see this video to know more:
FAQs
Here are a few questions and answers about stitching for specific circumstances.
Conclusion
While I did strive to put together a comprehensive list of different stitches, there is a lot to learn if you want to learn them all and when best to use them.
Start with the basic ones and then add more as your skill progresses. Even expert sewists might not use all the stitches here depending on what they like to sew.
For most sewing projects, a regular straight stitch and a zig-zag is what you need for basic sewing. Hand sewing is great for detailed work, mending, and when you want the sewing to be discreet.
What are your favorite sewing stitches? Let me know in the comments below.
 Top 12 Best Embroidery Machines for Beginners