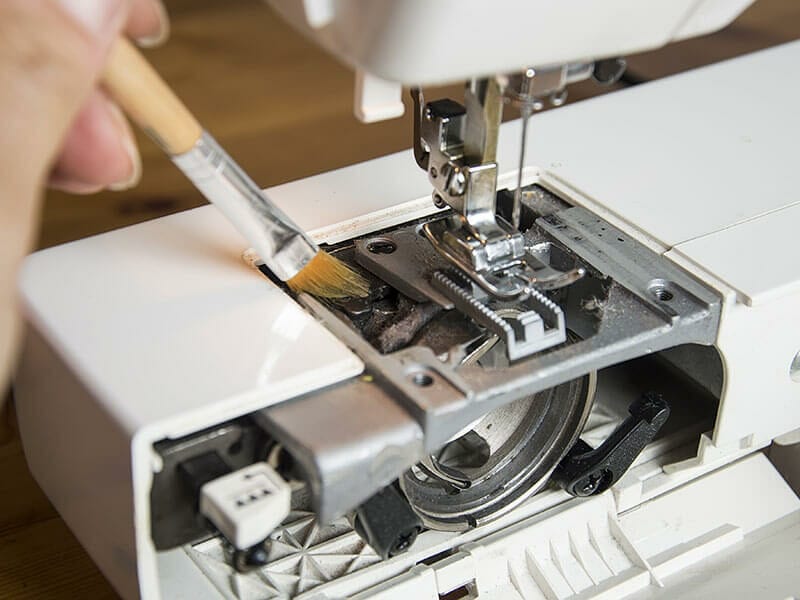
You think cleaning a sewing machine is quite complicated because you haven’t read how to clean a sewing machine yet. This article will provide you a detailed guide as well as tips when you tidy up your appliance.
Besides, you need to know when you should clean it to maintain your device’s appearance and realize its problems in time. You had better read this information carefully to collect valuable ideas.
This post will not disappoint you. Let’s scroll down and explore it right now.
Let’s see what information I have collected via these summaries.
Types Of Sewing Machine And Their Differences
- Purpose And Design
- Purpose And Design
- Why Do You Need To Clean A Sewing Machine?
How To Clean A Sewing Machine?
Before You Clean
Step 1: Read the manual and arrange your sewing space
Step 2: Collect necessary equipment
Step 3: Dissemble needle
When You Clean
Step 1: Wipe down the exterior
Step 2: Clean the feed dogs and under the throat plate
Step 3: Clean the bobbin case
Step 4: Clean the shuttle hook
Step 5: Tidy up the tension discs, thread the spool pin, and take-up lever
After You Clean
Step 1: Lubricate your sewing machine
Step 2: Reassemble your machine.
Step 3: Wipe down your machine again
Step 4: Operate your machine
How To Clean A Singer Sewing Machine?
How To Clean A Brother Sewing Machine?
How To Clean An Industrial Sewing Machine?
How To Take Care Of A Sewing Machine?
- Clean And Cover Your Sewing Machine
- Replace Needle Often
- Calling Annual Service
- Use A Compressed Air
- Oil Your Sewing Machine
- Call The Help Of Experts When Your Machine Needs To Be Repaired
- Clean One Area At A Time
- Store Your Sewing Machine
- Tighten The Screws
When Should You Clean A Sewing Machine?
FAQs
- When Should You Oil A Sewing Machine?
- How To Prevent Sewing Machine From Problems?
- Can I Use Baby Oil To Lubricate A Sewing Machine?
Types Of Sewing Machine And Their Differences
The sewing machine was invented many decades ago; it has contributed to change the clothing industry completely. You can easily catch 2 main kinds of sewing machines on the market: domestic sewing machines and industrial sewing machines. (1)
Each of them has separated advantages and disadvantages, yet I will not dig into these aspects. Instead of that, I will provide you with several features to help you differentiate them.
Purpose And Design
Domestic sewing machines are designed for home use, which means they can sew regular fabrics such as cotton, light and thin material, and more, yet you can only use them for a couple of hours at a time.
You can simply transport them to anywhere you want without making any effort, thanks to their light materials and compact design.
Meanwhile, industrial machines can sew heavy-duty fabrics, including leather, canvas, and others. They are perfect to work constantly without overheating their inside components. As its name implies, these devices are suitable to use in industrial fields.
Components
The domestic appliances are constructed with small motors compared to industrial ones. These motors are enough to serve for home use and help your machine be lighter and space-saving.
When installing industrial devices, the producers have to use huge motors to help them withstand longer working and load more projects.
Why Do You Need To Clean A Sewing Machine?
Cleaning a sewing machine is the simplest way to save it when having some troubles. Almost all issues happen with your machine due to lint, dust, and thread ends accumulating inside its parts.
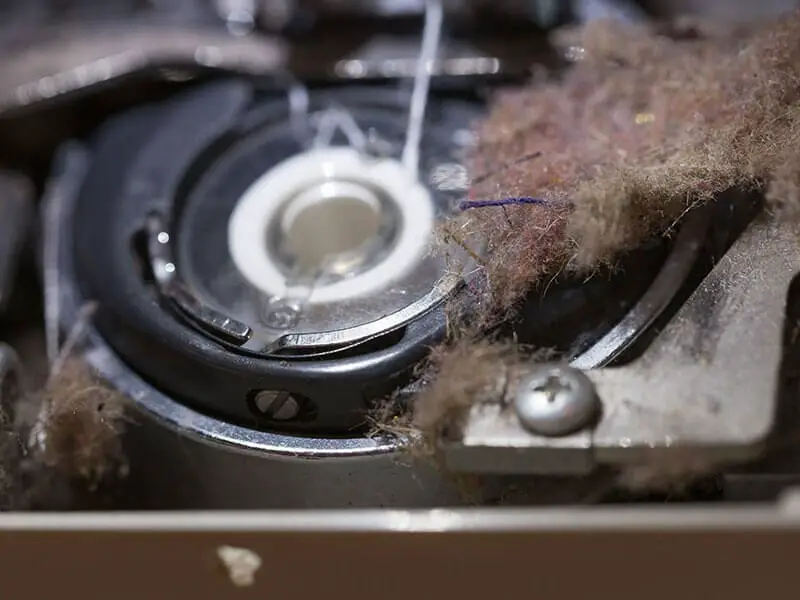
After a long time, this lint and dust can be soaked with degreaser or oil, creating a barrier to inhibit it from working. Therefore, you need to get rid of these to help it operate smoothly. You should clean it at the weekend or when you have spare time since this task requires much time for deep cleaning.
Besides doing deep cleaning once every period, you need to brush these particles right after you are done to reduce dust sticking on the parts. These small pieces of fiber can fly out of the air, and you can accidentally breathe them in, which will threaten your health.
Thus, you should clean your sewing machine frequently to ensure it can run productively and protect your health from dangerous factors.
How To Clean A Sewing Machine?
This section will provide you general steps to clean a sewing machine since you can remove or add a few steps depending on what kinds of sewing machine you use.
To help you have an overall view of these instructions, I will divide them into 3 stages: before, while, and after cleaning. So, don’t waste your precious time anymore; let’s start.
Before You Clean
This stage will help you prepare all things before tidying up your machine. These steps are to disassemble the attachable components that will support you clean quickly and ensure safety.
Step 1: Read The Manual And Arrange Your Sewing Space
The essential step is to read your sewing machine manual to understand its components and how to disassemble them appropriately. This manual usually contains how to clean the sewing machine section, and you should read it to know several precautions for this.
This step will take you for a while but save you from troubles while cleaning process. It also instructs to detach several need-to-clean components that will help you easily clean them and be time-saving instead of disassembling all parts.
You need to remove your projects from working areas to avoid dirtying while cleaning process. Afterward, remember to unplug your device and hang its cord in the high place.
Step 2: Collect Necessary Equipment
Here are all tools and supplies you need to use when cleaning. You should check their status before cleaning your machine.
- A small, flat lint brush
- A screwdriver
- Canned air
- Soft cloth and muslin cloth
- A compact handheld vacuum cleaner
- Sewing machine oil
- Sewing machine manual
- Extra needles
- Tweezers
Step 3: Dissemble Needle
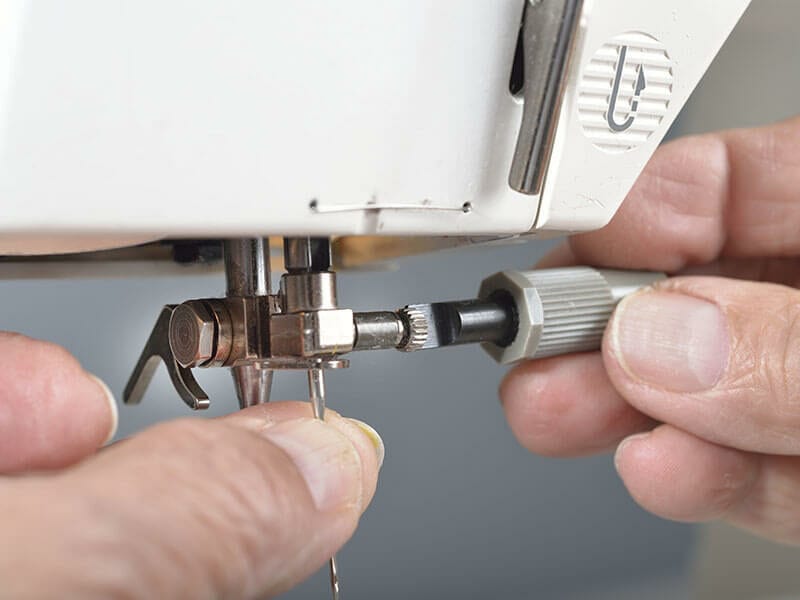
You should detach the needle to protect your finger from being prickled and make sure you will not break it when cleaning. Otherwise, you can turn the handwheel to raise the needle to as high as possible to reduce the risk.
When You Clean
After doing these preparation steps, you will jump into the most significant information that is the specific instruction about how to clean a sewing machine.
Step 1: Wipe Down The Exterior
You need to use a soft cloth to wipe down dust and lint on the outer of your machine. The perfect movement is from top to bottom of the device that allows dust and lint to drop down on the bottom and not to stick on the machine.
If any part of it is gotten stuck, you may need a handy vacuum sealer to pick up all particles. This cleaner also helps you suck up dust and lint on the bottom if you want to prevent them from re-flying out the air.
Step 2: Clean The Feed Dogs And Under The Throat Plate
The throat plate and feed dogs have collected a lot of lint and fluff, accumulated them under the throat plate after a long time. That’s why you need to clean them.
You need to take off the pressure foot that will help you remove the throat plate quickly. You should place all of them into a box to avoid missing them.
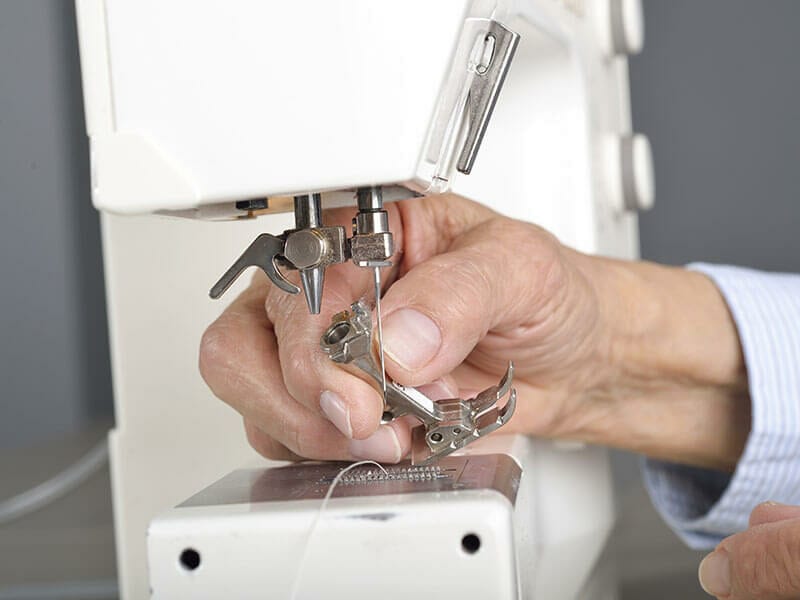
You can take photos while cleaning so that you can remember the orders for attaching and detaching your machine. When you disassemble the throat plate, you have to use the brush and the tweezers to eliminate dust and lint for its areas, including feed dogs.
The feed dogs can be raised or lowered to improve vision view. The brush cannot get rid of dust thoroughly; thus, using the handy vacuum cleaner or canned air for sucking up all the remaining particles.
If the throat plate is burred, you can sand it by using 500-grit sandpaper. You should be careful when using canned air since it can push dust into your machine or create moisture; you can keep the can at an angle that allows dust to blow out instead of blowing in.
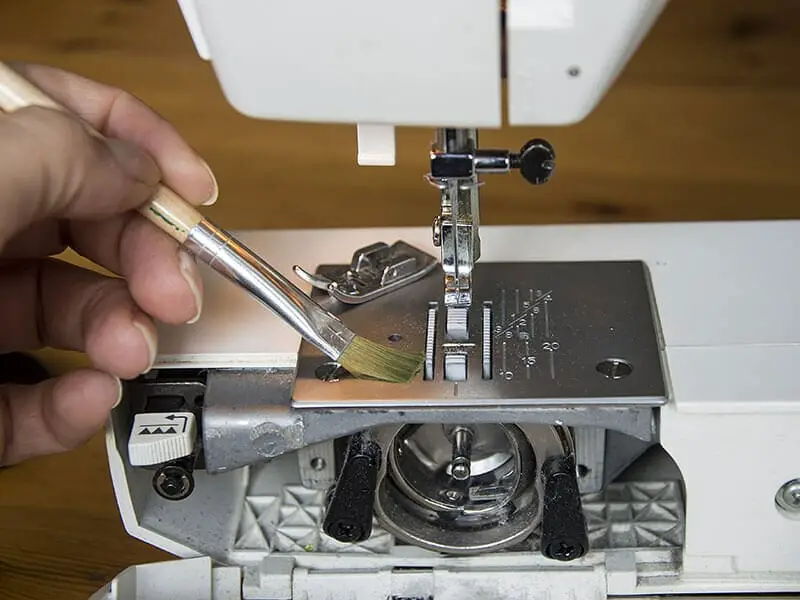
Step 3: Clean The Bobbin Case.
Use the screwdriver, unscrew and disassemble the needle plate or bobbin case. You have to store these screws in one place to avoid missing them. This area is one of the places containing many particles; thus, please pay extra attention to tidy it up.
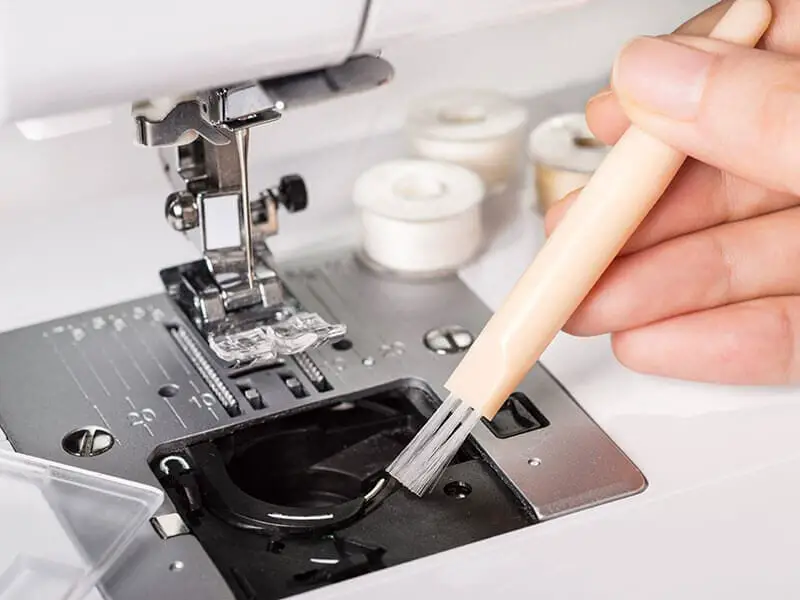
There are 2 common types of bobbin cases for 2 different sewing machines: Top-loading (drop-in bobbin) and front-loaded machines.
- The Top-Loading:
You only can access this kind of machine when you remove its throat bobbin. You will call the help of the screwdriver to eliminate the metal plate around the machine’s feet teeth.
Once it is removed, you can reach the bobbin and clean it immediately. You should use a brush to wipe out dust and lint instead of a vacuum cleaner since it can push these particles into your machine and block the gears or make it rust.
You have to read the manual to determine what parts you can detach and clean them with a soft cloth; if you are not sure about any part, never try to detach them.
- The Front-Loaded
You just need to unscrew and remove the needle plate for this machine and take the bobbin off. You can reach this part more easily compared to the above type. You need to brush particles towards the front of the machine to prevent dust and lint from re-entering.
Don’t forget to give it a nice wipe after brushing.
Step 4: Clean The Shuttle Hook
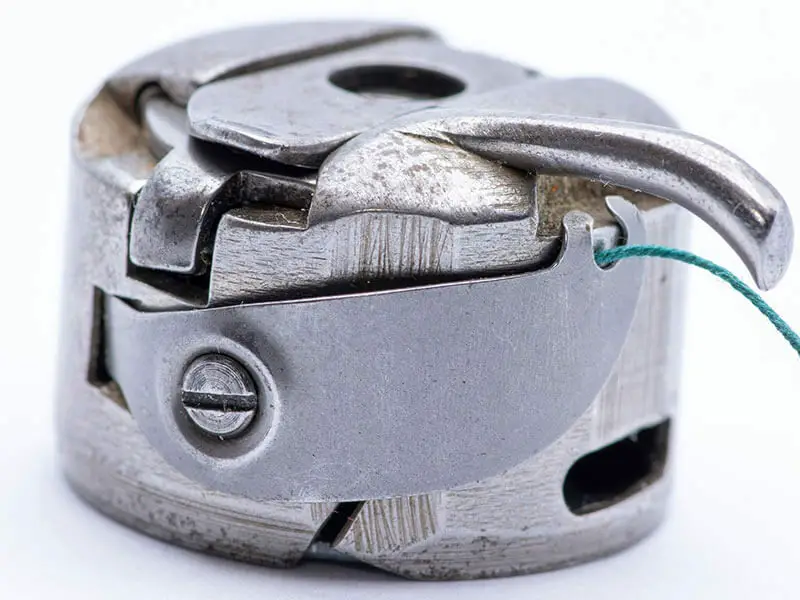
If your bobbin case has burs, you can sand it with sandpaper, as I mentioned. Afterward, you can clean the shuttle hook and inside the bobbin case. If your machine allows you to remove them, the process will become easier; otherwise, you can still tidy them up, yet it will take you more time.
The shuttle hook is a small component in the bobbin case spinning inside it. Both top-loaded and front-loaded require you to clean the shuttle hook with a soft cloth. Then, the canned air or cleaner will help you get rid of lint left behind.
Step 5: Tidy Up The Tension Discs, Thread The Spool Pin, And Take-up Lever.
The most popular reason that reduces the productivity of tension discs is lint and dust. They will build up on the tension and keep it from running smoothly. You need to reference the manual to determine all positions of tension discs, including inside and outside discs.
Some of them require you to detach the cover, while some can access from outside. A sewing machine has various detailed components; thus, you should control the tension to 0 and raise the take-up lever as high as possible to create room to reach them easily.
You can choose from 3 supplies such as canned air, a handy vacuum cleaner, or even dental floss to attack and remove the particles between discs. Afterward, you need to collect the thread from the spool and the take-up lever.
Once you pull the thread along the channels of your machine, you should pull it gently to avoid leaving much lint behind. You can use the cleaner, canned air, or a soft cloth to wipe it off.
This step is the last one in the cleaning process. You can follow my instructions to clean your sewing machine. These are a general guide that you can apply flexibly depending on your sewing machine constructions as well as which type of ones you are using: domestic or industrial.
Besides understanding the step-by-step guide, you should collect several useful tips to assist you in cleaning simply and effectively.
Useful Tips For You:
- You should be careful when cleaning the feed dog, shuttle, and rotary hook areas since the lint and dust can be pushed into or blown away. Thus, you should not use hard tools such as scissors, a screwdriver, or any hard things having a quite big head to eliminate particles from these places.
- Instead of that, the supplies have pointed heads such as tweezers or a needle to pick up the messes that a soft cloth and cleaner cannot solve. Be careful to avoid hurting yourself.
- Because you have to turn off the power before cleaning, you can manually turn the handwheel to control the position of components that will have a spacious room realize hidden dust or access quickly.
- You can tilt your machine head if necessary to help you reach components underside simply.
- You should use a clean and soft cloth to remove lint and dust left behind after brushing in specific areas.
- When you take off the needle, you need to ensure it is clean and the eye is not gotten stuck since you can reuse it.
- If the needle is blunt or broken, you have to replace it and make sure you choose the right needle for your machine, such as flat shank and round shank.
- Don’t forget to wipe off the excess oil and dust on your machine’s accessories as you can need to oil them later.
- Using dental floss is a wise choice to discard lint that builds up in tension discs.
- Wiping and brushing your machine is slightly different; wiping uses a cloth having a large exposure surface while brushing uses a small brush with a stiff bristle. You should wipe down dust from top to bottom while you had better brush from the lower part.
- After cleaning your machine, you can place the fabric under your foot and walk back and forth to collect any lint from the floor where the device has been installed.
- You should clean one place at a time and only remove detachable parts, not try to disassemble others. You can record a video or take photos to remember their direction and position that will help you save valuable time instead of reading the manual.
- You can use a box and arrange the components according to the timeline to assemble them fast.
- If the screws don’t loosen despite putting pressure on the screwdriver, you can soak a cloth in cleaning liquid such as kerosene or petrol, apply it to these screws, then loosen them again with the screwdriver.
- You can also use cleaning fluid to soak needles, slide plate, bobbin case, pressure foot, and others that don’t expose to the motor or electric outlet. Afterward, you need to leave it to dry completely before installing.
- If needed, you can wrap the motor to protect it from cleaning liquid.
- You can use a handy vacuum cleaner, yet you never use an air blower to remove lint and dust. This blower will push the trash into components where you are difficult to reach them. These particles will accumulate in them and inhibit your machine operate productively.
- If you have lost the instruction manual, you can search it on the internet and download a PDF file. Almost all manufacturers will upload files to help people study easily.
- The brush has ½” to ¾” wide is perfect for cleaning your device as its head is small for accessing narrow areas or hooks.
After You Clean
In this stage, you need to lubricate your machine, reassemble its components and test it out.
Step 1: Lubricate Your Sewing Machine.
When you complete all steps to clean your sewing machine, you need to move on to the how-to-oil section and try to run it when you reassemble all the components. Remember that not all sewing machines require you to lubricate them.
When your appliances don’t require, you can skip this section and reassemble its part to see whether it can run effectively or not. If you keep your device well-oil, it will run smoothly and create even stitches.
What You Need:
- A sewing machine manual
- High-quality sewing machine oil
- Soft cloth
How To Do:
- Check your manual
Usually, modern sewing machines don’t need to lubricate since they are self-lubricating, while traditional devices need to be oiled frequently. That’s why you have read the sewing machine manual to know whether your machine needs to be oiled or not and how many points of it require oil.
- Lubricate the oil
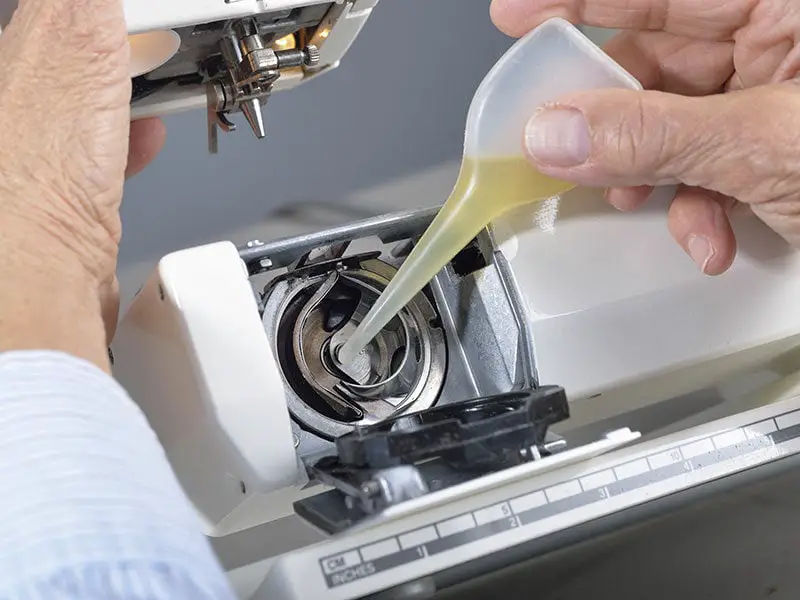
You should purchase specialized oil for a sewing machine; I recommend you to use oil with “white mineral oil” on its label. You will apply several drops of oil to these points after your machine is cleaned excellently.
Don’t forget to place a piece of fabric under your appliance to catch excessive oil. While lubricating, you need to turn the handwheel that allows oil can distribute to other parts. You can tilt the machine head back to oil the points under it.
- Wipe off excessive oil
You need to use a soft and clean cloth to soak excessive oil on your device. The spilled oil will collect dust and lint quickly, and you need to tidy up it more frequently.
Moreover, after oiling your machine, you can sew a small piece of fabric to release the oil from the motor.
Step 2: Reassemble Your Machine.
You need to use your manual one more time to know the order of the device’s components to reassemble them. When you determine their position, you have to use the screwdriver to screw them tightly.
Although your needle can be reused, I suggest replacing it as it can be blunter than the new one. Besides, this step is the most convenient for you to change it.
If you are not confident, you can detach and attach parts right after you clean them. This will help you reduce the risk of installing the wrong things.
Step 3: Wipe Down Your Machine Again
You have to use a soft and clean cloth to wipe the outer of your machine since after doing these previous steps, your hands can have oil and dust left behind, and you usually touch this machine.
You can add sewing machine polish while wiping to increase its sparkling and keep its smooth surface.
Step 4: Operate Your Machine.
The easy way to know your sewing machine is installed right or not is to test it. You have to plug in and turn on the switch to run it. You will sew fabric to check the stitches and control the tension discs appropriately.
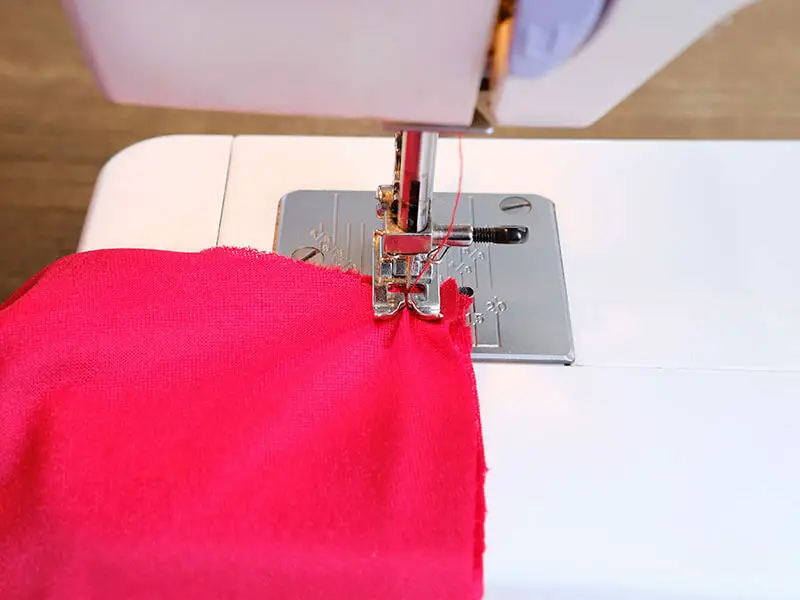
Oiling a sewing machine is also significant; thus, to help you deal with problems happening while oiling promptly, I have summarized a few tips for this process. You should reference them and apply them to your experiences.
Useful Tips For You:
- Never oil the sewing machine before completing the cleaning process thoroughly.
- You only can use sewing machine oil to lubricate your device; cooking oil, WD-40, or 3-in-1 oil are never used.
- You don’t turn on the power until all steps are done.
- You should lubricate the components in the sewing machine manually, and you need to check the visible parts during the oiling process.
- You should be concentrated on arrows, yellow or red points to determine where the oil holes are. The appropriate amount of oil is 1-2 drops for each hole.
- The handwheel will help you transport oil evenly when you turn it by hand.
- If the oil drops down on the table, you need to wipe it off immediately to avoid leaving streaks.
- Remember to wash your hand after lubricating the device.
- You cannot oil the handwheel, tension discs, rubber rings, or belts to avoid collecting dust and lint while running.
You can see this video to know more:
These steps are a general guide for all sewing machines, and you can apply them for almost all of them. However, for the singer, brother, and industrial sewing machines, you need to focus on several points to ensure they will run smoothly and productively.
Don’t let you wait too long; I will provide you these ideas immediately.
How To Clean A Singer Sewing Machine?
A Singer sewing machine was released in the 1800s, yet it is still used now. To keep it working properly, you cannot skip cleaning and oiling it. Let’s see how I clean a Singer sewing machine.
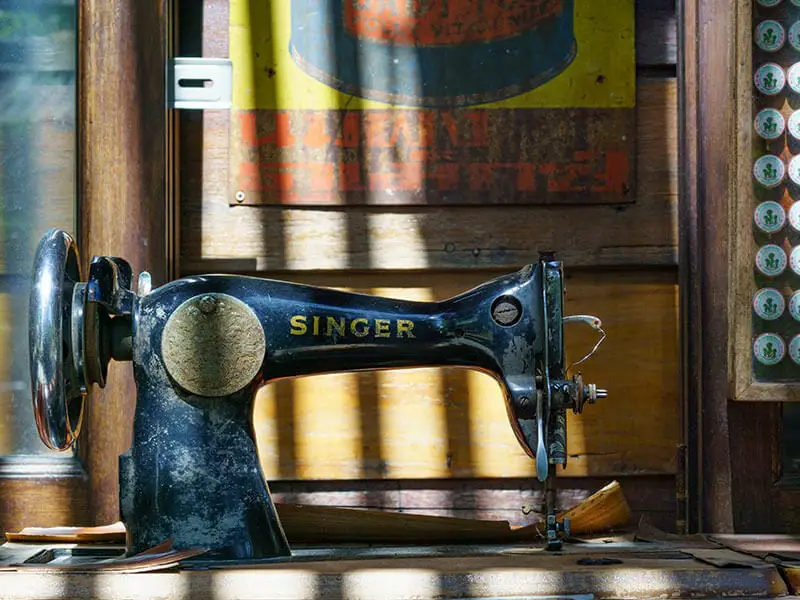
What You Need:
- Lint brush
- Sewing machine oil
- Soft cloth
- Tweezers
- Dust -spray
How To Clean:
Step 1: After you shut off the machine, you need to disassemble all detachable components such as needles, a pressure foot, bobbin areas, and thread for easy access.
Step 2: Use a lint brush to remove dust and lint from these areas; you can use a dust spray to blow out the messes inside the machine and in the bobbin case.
For narrow places, you can use tweezers to reach and get rid of lint from them. For other accessible areas, you can wipe them off with a soft cloth.
Step 3: After cleaning your machine, it’s time to lubricate it. You should place the large fabric under your device to avoid the mess from oil. You can reference the sewing machine manual to know how much oil you need to use for holes and joints; if you are unsure, you can add a little by little oil to them.
Besides these points, you need to apply several drops of oil to the bobbin case, shuttle hook, and hook races to help your machine run quietly.
Step 4: You can follow the general guide and continue implementing the next steps for your sewing machine.
Valuable Tips:
- You need to purchase the high-quality sewing machine oil for the Singer machine that qualifies these factors: the level of clearness, viscosity, and chemical structure. If the clear level of oil is high, it will reduce the sticking level for the components.
- The viscosity ranges from 18 to 20cST, perfect for oil since it is the appropriate thickness you should use for your machine. While you need to read the oil’s label to ensure the ingredients in the oil are suitable for the machine’s parts.
- If you don’t have sewing machine oil on hand, you can consider using these substitutes: white mineral oil or oil made for bike (3-in-1 oil)
- You can pour oil into tubes to avoid messing while applying it to the device.
How To Clean A Brother Sewing Machine?
Brother sewing machines are automated machines that means their parts can lubricate themselves when you use them; thus, you have to spend a lot of dollars owning a Brother sewing machine, yet I am sure it is worth investing in.
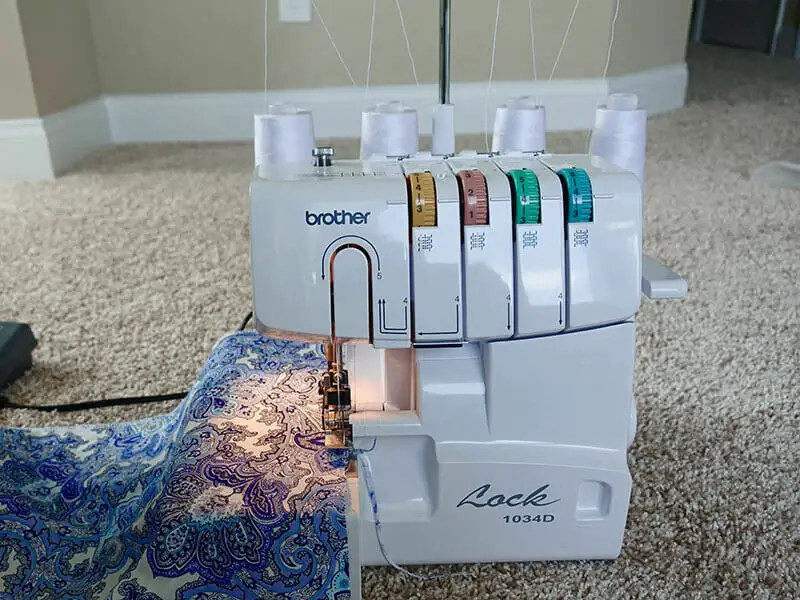
Knowing how-to-clean Brother sewing machine will help you save bulky cash instead of hiring other people.
What You Need:
- A screwdriver
- A paintbrush
How To Clean:
Step 1: You need to remove these detachable components, including needle, pressure foot, bobbin, and a plastic plate that will create space to help you clean easily. A screwdriver will support you in this step.
You need to do like when you change thread for the needle, pressure foot, and bobbin. For a plastic plate, you can loosen screws, slide this piece towards you, and you will get the plate.
You also need to remove the needle plate and bobbin case like I instructed in the overall guide and arrange their screws in order to avoid missing them.
Step 2: The next step is to clean feed dogs and bobbin cases. You only can use a paintbrush to eliminate lint and dust from your machine. If you wipe messes with a cloth, it can wipe off oil in the device along with every streak.
Moreover, when you clean feed dogs with cloth, its lint can build up there and keep the machine from running effectively.
The brush with a separated bristle will keep oil while brushing dust and lint. Besides, it has a compact head that allows you to reach inside further to pick up as much dust and lint as possible. You can use the brush to continue cleaning removed components in the first step.
Step 3: For the Brother machine, you just need to apply oil to several points in 2 places: under the needle plate and the face plate. You will pour 2-3 drops of oil into these points if you use the device for 2-3 hours per day.
In case you run it for a longer time, you need to call the help of Brother Authorized Service Center to lubricate them. After oiling them, you will reassemble and test this machine out.
You can see this video to know more:
How To Clean An Industrial Sewing Machine?
For cleaning an industrial sewing machine, you can follow my general instructions, yet there are some tips you should know to clean it perfectly.
You can see this video to know more:
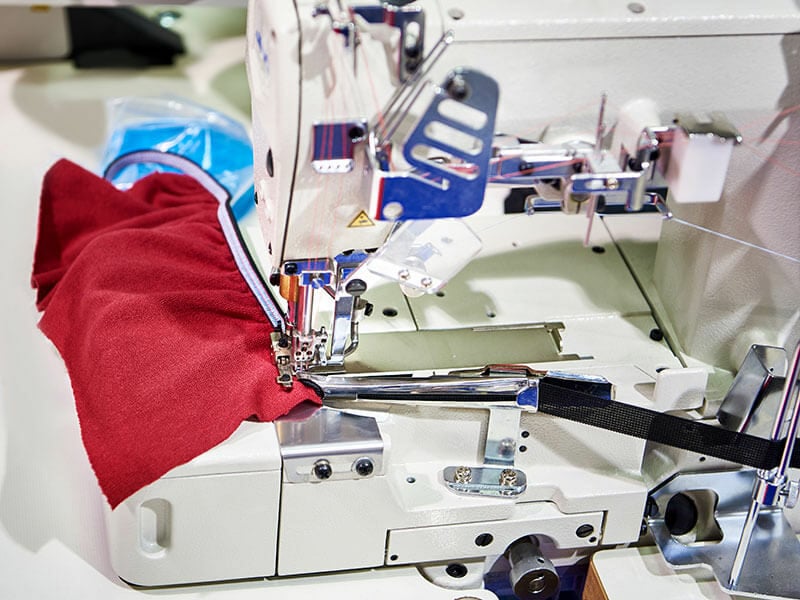
Tip 1: You only need to focus on removing lint and dust in the bobbin area instead of wiping its excessive oil. You can tilt the machine head and rest on the back to collect lint and thread clippings. Don’t forget to take off the bobbin case and brush it thoroughly.
Tip 2: You can use a dust cover to protect your machine from accumulating dust when not in use. If you have children, this cover will keep them away from your machine to avoid unwanted accidents.
Tip 3: The producers recommend you oil your machine daily to ensure it can operate smoothly. After lubricating these points, you should lift the pressure foot and run this device for several minutes or until the oil splash in the sight glass.
Tip 4: You should try to loosen screws in the throat plate, although they are tight to pick up lint that is clogged in feed dogs. Make sure you don’t drop any lint down oil pan in this area.
Tip 5: You can change the oil in your industrial sewing machine once or twice a year. If you don’t want to do that, you have to keep the oil as clean as possible. You can lift up the device to check the oil without removing the bobbin to prevent the lint from dropping down the oil.
If you catch any lint in oil, you have to get rid of it since the lint can stick to oil, be transported to other parts while the machine is running, and damage it. Don’t forget to contact sellers or manufacturers to solve problems when these tips cannot help you.
How To Take Care Of A Sewing Machine?
Besides cleaning a sewing machine frequently, you should know how to maintain and take care of it to extend its life expectancy. Even when the machine is not in use, you need to protect it well to operate smoothly later.
Clean And Cover Your Sewing Machine
If you want to shorten the cleaning time for your machine, you should wipe it thoroughly after each use. You need to use a soft cloth to remove lint and dust residue on the needle plate and bobbin cover, yet ensure the cloth doesn’t touch inside parts.
Moreover, covering your machine is also an effective way to prevent dust from entering. You should use high-quality thread to reduce lint left behind after sewing.
Replace Needle Often
The blunt needle cannot create excellent projects and cause looped thread, pull in the fabric, and skipped stitches; thus, replacing it frequently is essential. You need to choose a suitable needle for your machine and fabric.
Many professionals suggest you should install a new needle every 8 hours of use.
Calling Annual Service
You need to contact sellers or manufacturers to take care of your machine once a year since when you clean it on your own, there may be hidden dust inside; you cannot access these areas, but the experts can solve these problems well without detaching the device.
Besides, they will adjust the tension discs and timing to keep your appliance in good condition. Its lifespan can be prolonged thanks to this service.
Use A Compressed Air
You can use compressed air instead of a brush to discard lint and dust in your machine. You have to place the air away from the sewing machine at least 4 inches to avoid release moisture into it.
Oil Your Sewing Machine
Your sewing machine needs oil to run productively and quietly; thus, don’t forget to lubricate its components with oil. The high-quality oil is high in clear level, 18-20cST viscosity, and to contains appropriate ingredients in the formula.
You should reference the instruction manual to know what points need to be oiled and only drop several drops of oil to them. Some sewing machine models require you to oil while others don’t since they are self-lubricating.
Call The Help Of Experts When Your Machine Needs To Be Repaired
If your machine has any problem without relating to dirty, you should call the help of professionals. They are equipped with knowledge and technicians to deal with these issues.
Clean One Area At A Time
To prevent the dust and lint from entering inside components, you should clean one area at a time. Besides, this tip will help you not miss any parts such as screws while cleaning.
Store Your Sewing Machine
You should store your machine at room temperature and dry place yet ensures to provide this room enough light for you to sew. In addition, you should not place it in rich-moisture and dust areas.
Almost all sewing machines are made from metal; the moisture will rust if you store them in there.
Tighten The Screws
After a long time of use, the screws tend to loosen; thus, you need to tighten them frequently. The loosened screws can cause many problems, including time-consuming to sew and other errors for your machine.
When Should You Clean A Sewing Machine?
To answer this question, you need to consider 3 factors: how often you use it, where you place it and how you use it.
How Often You Use It?
If you use it more than once a year, you don’t need to clean it often, yet you should pay extra attention to keeping it properly. If you use your sewing machine daily, you need to clean it every time you replace the bobbin thread.
Yes, I will not recommend you a fixed period since the rule is not to allow dust and lint to go farther into your machine. If you let the messes into it, the sewing process will not be smooth, and you have to pay more money to hire an expert.
Where You Place It?
The room you store a sewing machine can decide how often you clean it. When you place it in the industrial environment, you have to tidy it up often as this place contains a lot of dust and lint.
When you keep it in your room, you need to tidy up your room often to ensure the machine can expose to dust and lint as least as possible. Besides, you can take the appliance to other places but ensure you clean it after every travel since it can collect dust on the way.
You can purchase a travel bag to store the machine that will help you reduce the dust and lint that can get into the device.
How You Use It?
This is a key to decide how often you need to clean your machine. Depending on what kinds of fabric you use, you can arrange the schedule to clean it.
When you sew heavy-fabric such as leathers, vinyl, or other kinds of fabrics that don’t release much lint during the sewing process, you can clean after quite a long time of use.
Instead of that, you need to clean it more often when you work with cotton and other fabrics that produce much lint. Besides, if you transport fabrics as well as stop and start the machine often, you have to increase the frequency of cleaning it.
FAQs
Have your learned how to clean your sewing machine after reading my post? If you have not gotten all information yet, don’t worry since I will provide you several frequently asked questions to clear your problems. Keep reading and discover them with me.
Don’t Let A Dirty Sewing Machine Inhibit You
If your sewing machine gets dirty, let’s follow my instructions to “refresh” this device. The step-by-step guide will help you save your time to call the help and your cash for hiring experts. Besides cleaning it completely, you should lubricate it frequently to ensure your machine will run productively.
I hope my post can support you in cleaning a sewing machine in a short time. Remember to remove all dust and lint from your device before applying oil to avoid the messes that can stick in its components.
Do you often clean your sewing machine? Which oil is your favorite to lubricate your appliance? If you have more tips and recommended products that help cleaning a sewing machine become more quickly, don’t hesitate to share with people via the comment box chat below.
References
1. wikipedia.org. 2021. Sewing machine – Wikipedia.

 How to Sew a Kimono Jacket